
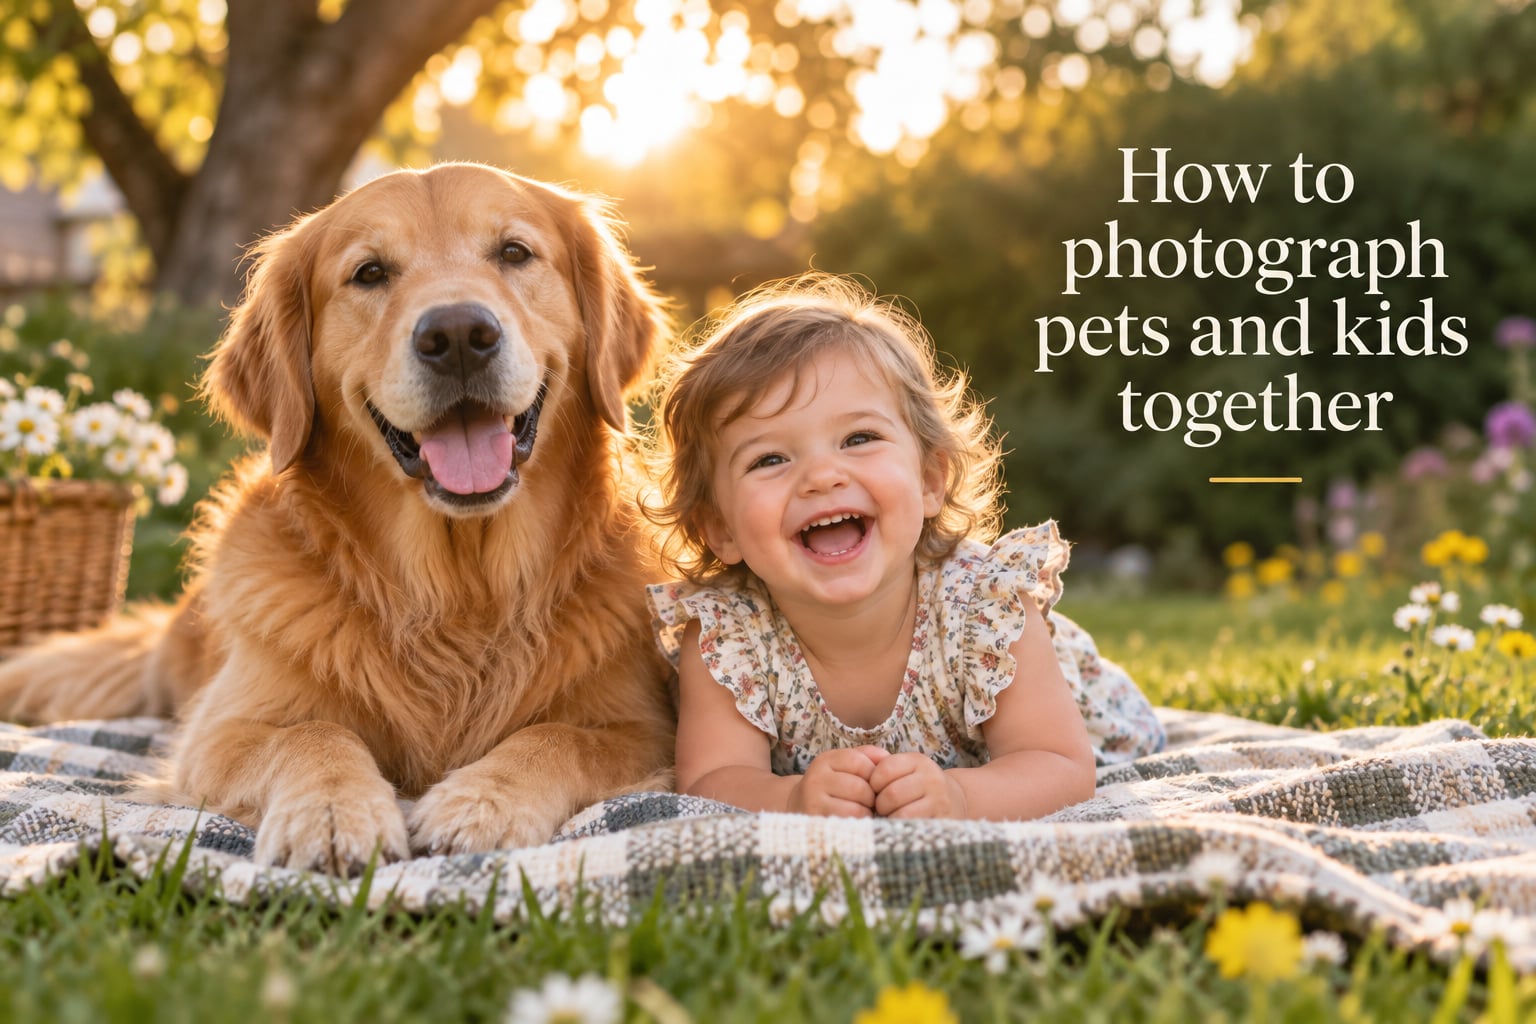
I have spent the last several years behind the camera photographing families with their pets, and I can tell you this: the photos that make parents tear up are almost never the perfectly posed ones. They are the blurry, mid-laugh, tail-wagging, toddler-falling-over snapshots where the dog is licking the kid’s face and nobody is looking at the lens. Those are the keepers.
If you are wondering how to photograph pets and kids together in a way that actually captures the bond between them, you have landed on the right guide. This is the playbook I wish I had when I started – covering camera settings, lighting, posing, safety, working with dogs and cats, what to wear, and how to handle the chaos when nothing is going as planned.
Whether you are a parent with a smartphone, a beginner with a mirrorless camera, or a working family photographer looking to refresh your approach, the techniques below will help you create photographs that feel like the relationship you see every day at home. Let’s dig in.
Table of Contents
- Quick Tips for Photographing Pets and Kids Together
- Before the Shoot: Planning and Preparation
- Camera Settings and Gear for Kids and Pet Photography
- Lighting: Natural Light vs Flash for Pet and Kid Photos
- How to Pose Kids and Pets Together
- Capturing Candid Moments and Action Shots
- Working with Pets: Treats, Toys and Attention-Getting Tricks
- Safety Considerations for Kids and Pets
- What to Wear for Family Photos with a Pet
- Seasonal and Holiday Photo Ideas with Pets and Kids
- Editing and Post-Processing Tips for Pet and Kid Photos
- Common Mistakes to Avoid in Pet and Kid Photography
- Frequently Asked Questions
- What camera settings are best for photographing pets and kids together?
- How do I get my dog to look at the camera while photographing kids?
- How do you safely photograph a baby with a family dog?
- What should kids wear for family photos with their dog?
- How do photographers get natural candid photos of kids and pets?
- Conclusion
Quick Tips for Photographing Pets and Kids Together
When time is short or you just need the essentials, these eight tips cover the core of how to photograph pets and kids together. Each one solves a problem I have personally run into during real sessions.
- Shoot at 1/500s or faster. Kids and pets move in unpredictable bursts, and anything slower will leave you with motion blur on faces.
- Use burst mode continuously. The winning frame is rarely the first one – it is frame #23 in a sequence of your dog jumping with your toddler.
- Avoid flash whenever possible. Pets often spook at flash, and direct flash on a child’s face creates harsh shadows and red-eye. Rely on natural light.
- Get down to their level. Crouch, sit, or lie on the floor. Eye-level photos of kids and pets together feel intimate and immersive.
- Use a wide aperture like f/2.8 to f/4. This blurs messy backgrounds and keeps the focus on the connection between your subjects.
- Build rapport before you raise the camera. Spend ten minutes playing with the pet while your child is nearby. The real expressions come after trust is built.
- Bring squeaky toys, not just treats. Sounds pull attention toward the lens faster than food, and treats often make dogs too excited to sit still.
- Embrace the chaos. The candid moments – the head tilts, the tumble, the unexpected kiss – are the photographs you will frame.
If you only have time to implement one of these, choose burst mode and a fast shutter speed. That combination alone transforms pet and kid photography from frustrating to genuinely fun.
Before the Shoot: Planning and Preparation
The best photos of kids and pets together almost always come from sessions where the photographer (or parent) planned ahead. Preparation is the single biggest difference between snapshots that feel forced and the ones that feel like a memory.
Pick the Right Time of Day
Match your shoot time to your subjects’ natural rhythms. Early morning and late afternoon are golden hour favorites for soft light, but they are also when most toddlers are at their calmest and most cooperative.
Midday sessions are tougher: harsh overhead shadows, squinting kids, and pets seeking shade. If you must shoot at midday, find open shade under a tree or a covered porch. Avoid scheduling around nap time or right before meals – a hangry toddler plus an under-exercised dog is a recipe for frustration.
Match Energy Levels
A hyper puppy and a shy toddler are not a good combination for a posed portrait. Walk the dog for twenty minutes before the session so they arrive calm but not tired. Give your toddler a snack and a bathroom break before you start.
For high-energy dogs, schedule a longer play session beforehand. The goal is to burn off the first wave of zoomies so the dog can settle into a working pace. I have learned the hard way that an over-excited dog will mouth your child’s hand mid-photo, no matter how well trained they are.
Pre-Session Hello (Without the Camera)
This tip comes straight from working photographers who specialize in including pets in family photo sessions. When you arrive at the location – whether it is a park, your living room, or a friend’s yard – spend the first ten minutes saying hello to the pet without your camera in hand.
Let the dog sniff you, scratch behind their ears, toss a ball. If you have kids with you, let them hand the dog treats or a favorite toy. By the time the camera comes out, you have already built trust, and the pet will look at you with relaxed, soft eyes instead of wary, suspicious ones.
Prep Checklist the Night Before
A quick prep checklist prevents most day-of disasters:
- Charge all camera batteries and clear memory cards
- Pack treats, squeaky toys, a leash, and a lint roller
- Lay out everyone’s outfits (more on that below)
- Walk the dog and trim any long fur near the eyes
- Tell the child what to expect: “We’re going to take photos with Luna. You can hug her, throw the ball, just have fun.”
Camera Settings and Gear for Kids and Pet Photography
You do not need the most expensive gear to capture beautiful photos of pets and kids together, but you do need the right settings dialed in before you start. Here is the technical foundation that makes everything else work.
Camera Settings Cheat Sheet by Scenario
These are the three core settings I default to for each common situation. Memorize the indoor/outdoor + static/action combinations and you will rarely need to fiddle mid-session.
| Scenario | Aperture | Shutter Speed | ISO |
|---|---|---|---|
| Indoor, static (posed) | f/2.8 – f/4 | 1/200s | 800 – 1600 |
| Indoor, action (playing) | f/2.8 | 1/500s | 1600 – 3200 |
| Outdoor, static (posed) | f/4 – f/5.6 | 1/500s | 200 – 400 |
| Outdoor, action (running) | f/2.8 – f/4 | 1/1000s | 400 – 800 |
| Golden hour candids | f/2.8 | 1/640s | 400 |
If you only remember one number from this entire article, make it 1/500s. That shutter speed freezes the kind of movement you will see between a kid and a dog playing together – paws mid-step, hair flying, tail mid-wag. For genuine running shots, push to 1/1000s.
Aperture and Depth of Field
A wide aperture (low f-number like f/2.8) does two things at once: it lets in more light, and it blurs the background. Both are useful when photographing kids and pets together because you usually want the focus on the bond between them, not the fence behind them.
One caution: at f/2.8 with two subjects at different distances, you may end up with the kid in focus and the dog slightly soft, or vice versa. If both need to be tack-sharp, stop down to f/4 or f/5.6 and give yourself more margin for error.
Burst Mode and Continuous Autofocus
If your camera has a burst or continuous shooting mode (and even most smartphones do now), use it for every frame with a pet or a child. The magic frame in a sequence of your dog leaping to catch a frisbee while your kid laughs is almost never the first shot.
Pair burst mode with continuous autofocus – on Canon this is AI Servo, on Nikon and Sony it is AF-C. Single-point AF works for posed portraits, but for action shots of kids and pets playing, you want the camera to track the closest moving subject automatically.
Lens Recommendations by Scenario
Choosing the right lens for how to photograph pets and kids together matters more than the brand or cost of the camera body. Here is a quick comparison.
| Lens Type | Best For | Watch Out For |
|---|---|---|
| 24-70mm f/2.8 zoom | All-around versatility | Heavier; mid-range flexibility |
| 35mm f/1.8 prime | Environmental portraits, indoor candids | Wide enough to catch both subjects without backing up |
| 50mm f/1.8 prime | Tight portraits, low light | Classic look but tight on group framing |
| 70-200mm f/2.8 telephoto | Outdoor action from a distance | Heavy and obvious; great for unobtrusive candid |
| 85mm f/1.8 prime | Beautiful background blur | Too tight for groups; ideal for kid + pet close-ups |
For most parents, a 35mm or 50mm prime is the easiest way to get professional-looking photos of kids and pets together without needing to zoom. For photographers, a 24-70mm zoom gives you the most flexibility when subjects are running between distances.
Mobile and iPhone Settings
If you are shooting on a phone, you have more capability than you think. The key is to lock focus and exposure by tapping and holding on your subject, then shoot in burst mode (on iPhone, hold the shutter button and slide left).
For iPhones, the 2x optical zoom is often the best choice for kid and pet portraits – it mimics the flattering compression of an 85mm prime. On any phone, enable grid lines to follow the rule of thirds, and use portrait mode for that creamy background blur, though be aware that portrait mode sometimes struggles with pet fur edges.
Lighting: Natural Light vs Flash for Pet and Kid Photos
Natural light is the single biggest reason family photos of kids and pets look soft, warm, and timeless. Direct flash is the single biggest reason they look harsh, dated, and unsettling – especially for pets.
Why Natural Light Works Best
Natural light wraps around subjects softly. It catches the highlights in a dog’s fur without blowing them out, and it gives a child’s skin a gentle, even glow. It also keeps your pet calm because there is no sudden burst of light to spook them.
The best natural light for kids and pets together is golden hour – the hour after sunrise or the hour before sunset. The light is warm, directional, and forgiving on skin tones. Window light is the indoor equivalent: large windows on overcast days create a soft, even glow that flatters everyone.
When to Use Fill Flash or Bounce Flash
There are two situations where a controlled flash helps rather than hurts. The first is outdoor portraits in harsh midday sun, where a touch of fill flash balances shadows under the eyes and chin (the dreaded “raccoon effect”). The second is indoor group shots where the subject in shadow needs to match the brighter background.
In both cases, never point a flash directly at the subject. Bounce it off a ceiling or wall, or use a diffuser. Direct flash on a kid’s face creates shiny foreheads, and direct flash on a pet’s eyes produces glowing demon pupils you will spend hours trying to fix in editing.
Indoor vs Outdoor Lighting Tradeoffs
Indoor sessions give you controlled conditions but require higher ISO and wider apertures, which means more image noise and less depth of field. Outdoor sessions give you beautiful natural light but introduce variable weather, harsh midday shadows, and unpredictable background distractions.
If you are new to photographing kids and pets together, start outdoors during golden hour in a familiar location like your backyard. Familiar scents help the pet stay calm, and familiar surroundings help shy kids relax.
How to Pose Kids and Pets Together
Posing kids and pets together is less about rigid arrangement and more about creating a setup where natural interaction can happen. The best poses look unposed because the photographer gave them just enough structure to be flattering.
Start at Floor Level
Almost every great photo of a child and a pet happens at their level, not yours. Sit on the floor, kneel, or lie on your belly. This eliminates the unflattering downward angle, brings you closer to their eye line, and lets you see the same world they see.
For very young children, the floor is the safest place to pose with a dog or cat. The kid cannot fall far, and the pet feels less towering and intimidating.
Side-by-Side Sitting
The most reliable posed composition: child and pet sitting or lying next to each other, both facing the camera. To get them there, have the pet sit first (treats help), then guide the child next to them with a hand on the pet’s back or a quiet “sit beside Luna.”
Always have a parent or helper standing just behind the photographer, within arm’s reach of the pet. This keeps the pet calm and gives you a backup handler if the dog suddenly bolts after a squirrel.
Action-Based Poses
Some of the most memorable poses are not poses at all – they are activities. Throwing a ball, blowing bubbles, reading a book together, “helping” the dog with a treat puzzle, or brushing the pet. Give them a small task and the camera captures the genuine focus, laughter, and connection.
A squeaky toy pulled from your pocket at the moment of capture will often produce a head tilt from the dog and a giggle from the child in the same frame. That single moment is worth an entire roll of posed portraits.
Use Props and Furniture
Chairs, couches, benches, and picnic blankets naturally slow down both kids and pets. A child sitting cross-legged on a blanket with a dog lying next to them is a calmer, easier-to-photograph setup than two subjects standing freely.
For multiple kids and multiple pets, props are essential. A wooden crate, a wagon, a doorway, or a large chair creates a defined area where everyone naturally gathers. Without that anchor, kids wander and pets follow, and the frame empties out fast.
Pose Ideas: 8 Favorites
Here are eight pose combinations that work for almost any kid-pet combination. Mix and match based on age, energy, and the pet’s training level.
- Child hugging pet from the side, both facing camera
- Pet lying down, child leaning back against them
- Child whispering into pet’s ear, pet head tilted
- Child and pet “high-fiving” (paw to hand)
- Pet on a chair or bench, child standing next to them
- Both lying on a picnic blanket, faces close together
- Child reading a book out loud to a calm pet
- Walking shot: child holding leash, both mid-stride
Capturing Candid Moments and Action Shots
Candid photographs of kids and pets together almost always become the favorites. They are also the easiest to capture if you set yourself up for them: stay close, keep the camera ready, and let the interaction happen.
Why Candid Beats Posed
Kids fake-smile the moment they know the camera is pointed at them. Pets often tense up. The candid frame – where the kid is laughing at the dog instead of at you, where the pet is mid-lick or mid-zoomies – shows the real relationship. That is the photograph parents come back for years later.
One of my favorite tactics: pretend to review photos on the back of my camera while the kid and pet play nearby. They relax, forget about the photos, and the magic starts happening on its own.
Predicting the Action
To capture a perfect action moment, you have to see it coming. Watch the body language: a dog about to jump tenses their hind legs, a child about to laugh scrunches their shoulders, a cat about to pounce flicks their tail.
When you see the cue, half-press the shutter to lock focus, then hold down burst mode as the action unfolds. You will end up with twenty frames of the same leap, and three or four will be frame-worthy.
Employ the Child
One of the smartest tactics I learned from other family photographers is to give the kid a small, photography-related job. Let them be the one who holds the squeaky toy and decides when to squeak it. Or have them “direct” a few frames – which produces adorable back-of-the-head shots of the child squinting through the viewfinder at their dog.
When the child has a role, they engage more deeply with the pet, which produces more authentic interaction, which produces better photographs. It also burns off some of that pre-teen “this is boring” energy if you are photographing an older child.
Working with Pets: Treats, Toys and Attention-Getting Tricks
Working with pets during a photo session is part craft, part patience, and part comedy. Every pet is different, but there are a few universal tools and tactics that make the job dramatically easier.
Squeaky Toys and Sound Effects
Sound is the fastest way to get a pet’s attention toward the camera. A squeaky toy held just above the lens produces immediate head tilts and perked ears. A duck call, a party horn, or even your own high-pitched “pup-pup-PUP” works in a pinch.
Reddit photographers and family photographers both confirm: one of the easiest candid moments to capture is the kid laughing at the photographer’s ridiculous barking or sound effects, with the dog tilting their head in confusion. It works on cats too – crinkle a treat bag and watch the ears swivel.
Treats That Backfire
Treats are useful, but they can also backfire spectacularly. One common mistake is holding a treat near the lens to get the dog to look at the camera – the dog will then spend the entire session staring at your hand instead of posing.
Another issue: a treat-motivated dog becomes so focused on food that they ignore commands, jump on the kid, or break pose every thirty seconds. Multiple Reddit users have described giving up on treats entirely and switching to toys or squeaks.
The trick is timing. Use treats to lure the pet into position, then put the treats away and switch to sound and praise for the actual photos.
Dogs vs Cats: Different Animals, Different Sessions
Dogs and cats require very different approaches. Here is a quick comparison.
| Aspect | Dogs | Cats |
|---|---|---|
| Energy | High; needs pre-session walk | Spikes in short bursts |
| Attention-getting | Squeaky toys, barking, treats | Crinkle bags, soft clicks, laser pointers |
| Posing | Sits, stays, “down” commands work | Sits only on their terms |
| Best photos | Action, eye contact, group shots | Quiet candid moments, lounging |
| Session length | 30-60 minutes | 10-20 minutes max |
For cats, plan a shorter session and embrace the cat’s natural behavior. Cats rarely cooperate with posed shots, so lean into candid: a cat curled up next to a reading child, a cat inspecting a new toy, a slow-blink at the camera. Those are the moments that define cat photography.
Handling Multiple Pets and Multiple Kids
The math gets harder quickly. Two kids and two dogs means four subjects, four sets of attention, and four times the chance someone looks away from the camera. The key is having a helper for each subject – one adult per animal or per child is the practical approach.
If you do not have enough helpers, stage the session in phases. Photograph kid A with pet A, then swap. Composite shots of all four together can come from a series of individual frames edited together – though staged group shots with everyone looking are also achievable with patience and a squeaky toy.
Safety Considerations for Kids and Pets
Safety is the part of how to photograph pets and kids together that should never be skipped or assumed. A photo session is a moment of distraction, and even the gentlest pet can react unexpectedly when a toddler pulls a tail or a stranger looms over them with a camera.
Newborns and Dogs
Newborn photography with a family dog requires extra caution. Never leave a newborn and a dog alone together, even for a second – and that includes during the photo session. Always have a handler holding the leash or sitting within arm’s reach of the dog, even when you are composing the shot.
For newborn sessions with pets, I recommend shorter sessions, calmer environments, and posed setups where the baby is in a bassinet or on a blanket and the dog is lying nearby on a separate surface. Avoid putting the baby on the floor at the same level as the dog.
Toddlers and Excited Pets
Toddlers move unpredictably, which can trigger prey-drive in some dogs. A running toddler can look a lot like a small animal to a dog with high prey drive. Keep the dog on a leash during transitions, and never let a toddler chase the dog.
Watch for stress signals in both subjects: lip-licking, yawning, or a tucked tail in the dog means back off. Whining, hiding, or repeated “no” from the toddler means the session is over. A good photo is never worth pushing a child or a pet past their comfort zone.
Leash and Harness Handling
Leashes show up in photos, which is why most photographers either crop them out later, use a thin leash that can be hidden behind a leg, or have the handler hold the leash low and out of frame. Retractable leashes are nearly impossible to hide and create tension on the dog’s neck that shows in the photo.
For very active dogs, consider a harness with a short lead for the session, which gives you more control and looks more flattering in frame than a collar and leash. Always confirm with the owner before adding or changing gear on their pet.
What to Wear for Family Photos with a Pet
Outfit coordination is one of the most overlooked parts of how to photograph pets and kids together, and it is one of the easiest ways to elevate your photos from snapshot to magazine-worthy. The pet’s coloring is your starting point – work backward from there.
Coordinate With Your Pet’s Coloring
Look at your pet’s dominant fur color. A black dog or cat looks striking against cream, rust, mustard, or soft pastels. A golden retriever pops against navy, deep green, or burgundy. A white pet looks crisp against warm earth tones.
You do not need everyone in matching outfits – that looks dated. Instead, choose a color palette of two to three colors and let everyone pick a piece in one of those colors. Add neutral whites, creams, and denim as fillers so the palette feels cohesive without being uniform.
Avoid Logos and Loud Prints
Big logos, cartoon characters, and busy prints draw the eye away from faces. Save them for play clothes. For photos, stick to solids, simple patterns, and small textures like knits or linen.
This is especially true for newborn and toddler sessions, where the parent often appears partially in the frame. A bright graphic tee can dominate a photo where you wanted the focus on the baby-and-dog cuddle.
Comfort First
The most beautiful outfit is useless if the child is miserable in it. Tags scratch, stiff fabrics itch, and tight waistbands cause fidgeting. Choose soft, breathable pieces your child has already worn and washed – familiar comfort translates into natural expressions on camera.
For pets, skip the bowtie and tutu unless they are desensitized to wearing them. A stressed pet with a slipping bandana will ruin more photos than it enhances. If you want pet accessories, photograph them on the pet first without kids to see how they react.
Seasonal and Holiday Photo Ideas with Pets and Kids
Seasonal and holiday themes are an easy way to give your photo session a built-in concept. They also create natural prompts for action – picking pumpkins, hanging ornaments, splashing in a sprinkler – which leads to better candid photographs of kids and pets together.
Christmas Card Photos with Dogs
Christmas is the most popular pet-and-kid photo season. The classic setup: child and dog in front of a tree, both looking at the camera, ideally with a small prop like a wrapped present or a string of lights.
Less classic but more charming: child “helping” the dog open a present (use empty boxes with paper they can rip), child reading a holiday book aloud with the dog at their feet, or a candid of the family opening stockings on Christmas morning with the dog investigating wrapping paper.
Fall Family Photos
Fall is my favorite season for kids and pet photos. The light is gorgeous, the colors photograph beautifully, and there are endless activities to use as candid prompts.
Apple orchards, pumpkin patches, leaf piles, and hay bales all work as backdrops. A child helping a dog carry a stick through fallen leaves produces magical action shots. Be aware of mud – it photographs beautifully on a dog’s paws but is less cute on a toddler’s white dress.
Summer and Beach Photos
Beach sessions are perfect for kids and high-energy dogs. The open space lets them run, the water produces genuine laughter, and the neutral sand background keeps the focus on the subjects.
Time beach sessions for late afternoon to avoid harsh midday sun and to catch the warm golden hour glow. Bring a towel for the dog, fresh water for the kid, and accept that everything will end up sandy.
Spring and Birthday Photos
Spring brings blossoms, baby animals, and pastel palettes. Photograph kids holding a bouquet, picking flowers, or running through a field of long grass with a bounding puppy.
For birthday photos, let the child “share” cake with the pet (most dogs will lick the plate clean), blow out candles with the pet watching curiously, or open gifts with the dog tugging at the ribbon. These candid moments are the ones that end up framed.
Editing and Post-Processing Tips for Pet and Kid Photos
Editing is where good photos become great ones. A few minutes of post-processing can rescue a flat exposure, fix a color cast from mixed lighting, and turn a messy background into a soft painterly blur.
Basic Editing Workflow
Start with exposure correction: most kid-and-pet photos benefit from a small bump in shadows and a tiny pull-down on highlights. Then adjust white balance – pet fur is one of the trickiest surfaces for color accuracy because warm fur under cool window light turns muddy fast.
Increase clarity and texture moderately. Too much clarity exaggerates every eyelash and whisker into something distracting. A gentle bump (around +10 to +15) brings out the catch-light in eyes and the texture of fur without looking over-processed.
Color Balance with Fur
Pet fur reflects nearby colors – grass, blankets, the kid’s bright pink shirt. If your white dog looks slightly green from grass reflection, drop the green saturation. If your black cat looks blue from sky reflection, warm up the temperature slightly.
For multi-pet households where one dog is white and another is black, editing is a balancing act. Use local adjustment brushes to bring the white dog’s exposure up and the black dog’s exposure down in the same frame.
Cropping for Stronger Composition
Cropping turns a snapshot into a portrait. The classic rule: keep both subjects’ eyes in the upper third of the frame, leave slightly more space in the direction they are looking or moving, and crop tight enough to remove distracting background elements.
For group shots of multiple kids and pets, square or 4:5 crops often look cleaner than the standard 3:2 landscape. They also perform better on social platforms where most family photos end up.
Removing the Leash (When Needed)
If a leash or harness strap slipped into the frame, the healing brush or clone stamp in Lightroom or Photoshop removes it in seconds. Select an adjacent area of similar color and texture, then brush over the leash.
Be careful not to over-edit. A few leashes and harnesses are fine to leave in frame – they are realistic, and viewers do not mind them as much as photographers do.
Common Mistakes to Avoid in Pet and Kid Photography
These ten mistakes are the ones I see most often in family photo submissions and amateur sessions. Avoiding them will instantly lift the quality of your photos of kids and pets together.
- Using flash directly on subjects. Spooks pets, creates harsh shadows on kid’s faces, and produces glowing eyes.
- Shooting too slow a shutter speed. Anything slower than 1/250s guarantees motion blur with both subjects moving.
- Stopping down too far. f/11 makes everything sharp – including the messy yard behind your subjects.
- Forgetting to lock focus on eyes. A tack-sharp nose with soft eyes ruins the photo every time.
- Forcing the pet to sit-stay for too long. Pets lose interest after a few minutes. Rotate activities and keep sessions short.
- Not bringing a helper. One adult per subject makes everything easier and safer.
- Posing stiffly. Stiff poses look unnatural. Give them a small activity and let candid moments happen.
- Ignoring the pet’s stress signals. Lip-licking, yawning, tucked tail: take a break.
- Letting the child fake-smile for too long. Engage them in play or conversation to reset their natural expression.
- Skipping the post-processing step. Even 60 seconds of editing turns a flat JPEG into a print-worthy photo.
The good news is that every mistake on this list is fixable, often with a single setting change or a small habit shift. Pick one to work on this week, and you will see measurable improvement in your next session.
Frequently Asked Questions
What camera settings are best for photographing pets and kids together?
Start with shutter speed 1/500s or faster to handle the unpredictable movement of both subjects. Use a wide aperture of f/2.8 to f/4 to blur distracting backgrounds, set ISO between 400 and 1600 depending on available light, and pair burst mode with continuous autofocus so you capture the peak action across multiple frames.
How do I get my dog to look at the camera while photographing kids?
Hold a squeaky toy just above the lens and squeak it once right before each frame – the sound pulls both the dog’s attention and usually makes the child laugh too. Treats work but can backfire by over-exciting the dog, so use them sparingly and only to lure the dog into position before switching to sounds and praise for the actual photos.
How do you safely photograph a baby with a family dog?
Always have a second adult holding the leash within arm’s reach of the dog, even during posed shots. Keep the session short (15-20 minutes), pose the baby in a bassinet or on a raised blanket rather than on the floor with the dog, and never leave the baby and dog alone together – not even for one second. Watch for stress signals like lip-licking or a tucked tail and end the session if either subject seems uncomfortable.
What should kids wear for family photos with their dog?
Coordinate two or three colors with the dog’s fur color rather than matching exactly. Solid colors and simple textures photograph better than logos or busy prints. Choose soft, comfortable pieces your child has already worn so they stay relaxed and happy through the session, and skip stiff fabrics, tags, or anything that restricts movement.
How do photographers get natural candid photos of kids and pets?
Build rapport first by spending 10 minutes with the pet and child before raising the camera, give them a small activity like throwing a ball or reading a book, then shoot in burst mode while staying close at their eye level. Pretend to review photos on the back of the camera while they play – the moment they forget about the lens is the moment the real expressions appear.
Conclusion
Photographing pets and kids together is one of the most rewarding kinds of family photography because the bond you are capturing is real, present, and already in the room. Your job is simply to give it room to show itself.
Start with the basics: a fast shutter speed, a wide aperture, and patience. Get down to their level, bring a squeaky toy, and let the candid moments happen. Keep sessions short, watch for stress signals, and prioritize comfort over perfection. Build a small color palette around your pet, dress your child in soft clothes they already love, and let the natural interaction lead the session.
The more you practice how to photograph pets and kids together, the more you will find your own rhythm – your favorite lens, your go-to sound effect, your favorite lighting setup. Each session teaches you something new about how kids and animals communicate, and the photographs you take home become the visual record of one of childhood’s most meaningful relationships.
Pick one technique from this guide to try in your next session – whether it is just a smartphone at the kitchen window or a full mirrorless setup in a meadow – and see what happens. The photos you take today will be the ones your family treasures for decades.