
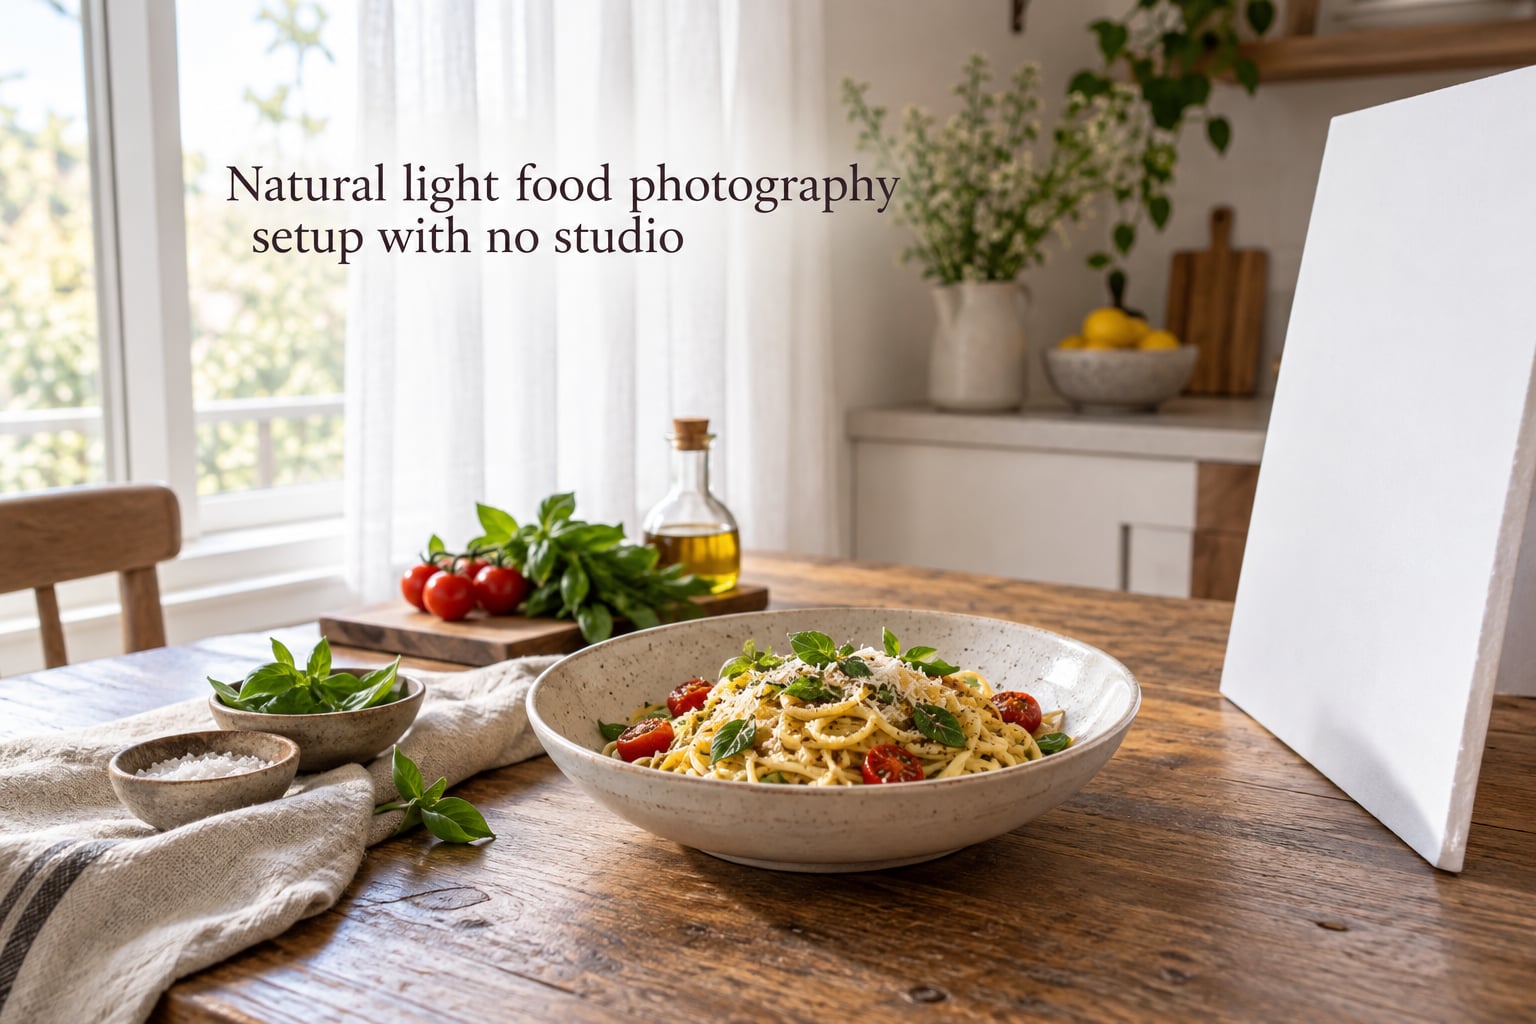
A natural light food photography setup is a 3-component arrangement: a window as the light source, a diffuser (sheer curtain, bedsheet, or 5-in-1 reflector) to soften the light, and a reflector (white foam board or poster board) opposite the window to fill shadows. You can build one at home in under five minutes using items you already own, and it produces the soft, dimensional light that makes food look appetizing without any studio gear.
I started shooting food photos at my kitchen table with nothing but a phone and a sunny window. Three years and a few hundred recipe shoots later, the setup has barely changed: same window, same foam board, same white bedsheet clipped to a chair. The expensive lighting kits I tested later did not beat that humble arrangement for everyday food photography, and I will show you exactly why.
If you have ever wondered whether you can take food photos that actually look good without renting a studio, buying strobes, or learning a complex lighting diagram, this guide is for you. We will walk through the natural light food photography setup that professional food bloggers use, the DIY alternatives you already have at home, and the small adjustments that take your shots from flat and forgettable to soft and magazine-worthy.
Table of Contents
- Why Natural Light Beats Studio Gear for Home Food Photography
- The Basic 3-Component Setup: Window, Diffuser, and Reflector
- Choosing the Right Window for Food Photography
- DIY Diffuser Options You Already Own
- DIY Reflector and Negative Fill with Household Items
- Direction of Light: Side Light vs. Backlight for Food
- Soft Light vs. Hard Light and Why Soft Wins for Food
- Time of Day and Weather: When Window Light Works Best
- Camera Settings Starting Point for Natural Light Food Photography
- iPhone and Smartphone Tweaks for Window Light
- How to Photograph Food in a Windowless or Dark Apartment
- Common Mistakes to Avoid
- The 5-Minute Light Test: Evaluate Any Window Before You Shoot
- Frequently Asked Questions
- What is the best light setup for food photography?
- What is the best setup for food photography?
- What are some tips for starting with food photography as a beginner?
- What is the best beginner camera for food photography?
- How do I photograph food in a dark apartment with no window?
- Do I really need studio lights for food photography?
- Conclusion
Why Natural Light Beats Studio Gear for Home Food Photography
Natural light has one huge advantage over most studio setups for food: it is already diffused, already beautifully colored, and already exactly where you need it. A north-facing window on a cloudy afternoon produces light that food photographers pay thousands of dollars to imitate with softboxes, scrims, and gels.
Food looks appetizing under soft, directional light because soft light wraps around curves and reveals texture. Hard light from a bare bulb or on-camera flash flattens surfaces and creates harsh shadows that make creamy soups look chalky and glossy sauces look greasy. Window light, especially when filtered through a sheer curtain or overcast sky, gives you that soft wraparound quality for free.
The other reason natural light wins at home is convenience. You can set up, shoot, and break down in fifteen minutes because your light source is the sun. No tripping over light stands, no waiting for strobes to recycle, no wrestling with triggers that will not pair. Food is perishable and styles do not hold. A setup that is fast and forgiving lets you actually photograph the meal while it still looks good.
The Basic 3-Component Setup: Window, Diffuser, and Reflector
Every natural light food photography setup you will ever build has three components working together: a window as the key light, a diffuser between the window and the food to soften the rays, and a reflector on the opposite side of the food to bounce light back into the shadows.
Component 1: The window as your key light
Your window is your softbox. The bigger the window, the bigger and softer your light source, which means softer shadows and more forgiving light. Most home cooks shoot next to a standard double-hung window, which is plenty. Skylights and sliding glass doors work even better because of the larger surface area.
Component 2: The diffuser to soften harsh sun
The diffuser is anything translucent that softens direct sunlight into flattering, wraparound light. A sheer white curtain, a bed sheet, parchment paper, or a 5-in-1 photography reflector all do the same job. Without a diffuser, midday sun pours through the window and creates harsh, distracting shadows on your food.
Component 3: The reflector to fill shadows
The reflector bounces light from the window back into the dark side of your food. A white foam board from the dollar store is the most popular choice because the white surface returns clean, neutral light. Without a reflector, the side of your food facing away from the window falls into deep shadow, and the image looks moody whether you wanted it to or not.
Stack those three pieces and you have a complete natural light food photography setup with no studio required.
Choosing the Right Window for Food Photography
Not all windows are equal. The direction your window faces changes the color, intensity, and duration of the light you will receive throughout the day.
North-facing windows (in the Northern Hemisphere) are the gold standard for food photography because they deliver consistent, indirect light all day with very little direct sun. South-facing windows are the second best, especially in winter when the sun sits lower. East-facing windows give beautiful, warm morning light for about two hours after sunrise. West-facing windows do the same thing in late afternoon.
Avoid direct overhead sun streaming straight into your window. That harsh, top-down light creates raccoon eyes under bowls and ugly hot spots on liquids. If direct sun is your only option, a diffuser becomes mandatory, not optional. Indirect light, where the sun hits a wall or sidewalk outside and bounces into the window as soft, reflected light, is what you want.
DIY Diffuser Options You Already Own
The diffuser is the single piece of the natural light food photography setup with the most low-cost substitutes. You probably already own at least three of these.
A sheer white curtain is the easiest diffuser of all. If your kitchen window already has a voile or lace curtain, leave it closed and shoot through it. A white cotton bed sheet clipped to a chair, a tension rod, or a couple of Command hooks works just as well. Parchment paper taped to the window frame is a budget classic that softens light without blocking too much of it.
If you want to invest a little, a 5-in-1 reflector (the round fold-out kind you have seen in every photographer’s studio) is the most versatile tool because it doubles as a diffuser, a white reflector, a silver reflector, a gold reflector, and a black flag for negative fill. A 32-inch round is the sweet spot for food work on a kitchen table.
DIY Reflector and Negative Fill with Household Items
A reflector on the shadow side of your food is what separates flat food photos from dimensional ones. The reflector lifts the shadows so detail stays visible without eliminating them entirely.
White foam board from a craft or dollar store is the workhorse. Cut it in half if you need two smaller bounce cards. White poster board, the back of a large pizza box lined with white paper, a piece of foam core from a craft project, or even a white sheet of cardboard all work in a pinch. The trick is to angle the board so the bounced light lands exactly where the deepest shadow on your food is, usually the front-facing side opposite the window.
Negative fill is the opposite move. Instead of bouncing light in, you block light from leaving. A black piece of foam board, a black t-shirt, or even a dark towel held on the shadow side deepens the contrast and makes moody, dramatic food photos possible with the same window setup. Use negative fill when you want darker backgrounds, deeper shadows, or a chocolate-cake-and-espresso mood instead of a bright citrus-and-yogurt vibe.
Direction of Light: Side Light vs. Backlight for Food
Where you place your food relative to the window changes everything about the photo. Side light, where the window is to the left or right of the food, is the most common and most flattering direction for food because it reveals texture. You see the crumb structure of bread, the ridges of a pasta fork, the flecks of herbs on a salad.
Backlight, where the window is behind the food pointing toward the camera, creates a beautiful rim of light around the edges. It is perfect for translucent foods like a glass of iced tea, a glistening donut, or fresh berries. The risk with backlight is that the front of the food falls into shadow, so a reflector becomes essential to keep detail in the front.
Front light, where the window is behind the camera pointing at the food, is the safest but flattens texture. Save it for overhead flat-lay shots where you want a clean, bright, almost shadowless look, like a top-down recipe photo on a white background.
Soft Light vs. Hard Light and Why Soft Wins for Food
Soft light and hard light are defined by the transition between highlight and shadow. Soft light has a gradual, feathered transition because the light source is large relative to the subject. Hard light has a sharp, defined edge because the source is small or far away.
Food almost always looks better in soft light. The smooth gradient reveals texture without creating distracting dark patches. Hard light exaggerates every bump and crease on a burger bun and turns glossy sauces into shiny hot spots. To check whether your window light is soft enough, look at the shadow your hand casts on the table. If the shadow edge is sharp and dark, you need more diffusion. If the shadow edge is barely there and gently fades, you have great soft light.
Time of Day and Weather: When Window Light Works Best
Your window gives you different light at every hour. The light you want is bright, indirect, and consistent, which usually means morning on an east-facing window, midday on a north-facing window, or any hour on a heavily overcast day.
Overcast skies are secretly the best food photography weather because the clouds act as a giant natural diffuser, turning the entire sky into one enormous softbox. If you live somewhere gray and rainy, that is not a problem, it is a feature. Direct sun, especially in the first hour after sunrise and the last hour before sunset, can produce warm, golden light that is gorgeous for moody shots but harsh and yellow for clean recipe photos.
In winter, daylight hours shrink fast and your window light may only be usable between 10am and 2pm. Plan your recipe shoots for those hours. In summer, you have a much wider window because the sun takes a longer arc across the sky and gives you softer, more angled light for longer.
Camera Settings Starting Point for Natural Light Food Photography
You do not need to be a settings wizard. A solid starting point for most window-lit food photos is ISO 100 to 400, aperture between f/4 and f/5.6, and shutter speed fast enough to handhold (1/125s or higher). White balance should be set to Daylight or around 5500K so the colors match what your eyes see.
Wider apertures like f/2.8 let in more light but reduce depth of field, so only part of the food is in focus. Tighter apertures like f/8 give you more depth of field, everything is sharp, but you need more light to compensate. f/4 is a sweet spot for single-dish shots where you want a soft background blur. f/8 is better for overhead flat-lay scenes with multiple elements that all need to be sharp.
Shoot in RAW if your camera supports it. RAW files preserve more highlight and shadow detail than JPEGs, which means you can fix a slightly overexposed window or recover a shadow that fell too dark without ruining the photo.
iPhone and Smartphone Tweaks for Window Light
iPhone food photography has come a long way and a phone is genuinely enough for most recipe blogs and Instagram accounts. The most important tweak is locking exposure and focus. Tap and hold on the food in your camera app until you see AE/AF Lock appear. This stops the phone from re-metering when you move slightly, which is the number one reason phone food shots come out half-dark and half-bright.
Turn on gridlines in your camera settings so you can apply the rule of thirds and keep horizons level. Shoot in ProRAW or your phone’s highest-quality RAW format if available. And never, ever use the digital zoom: walk closer to the food instead. The single lens on most phones is sharpest at its native focal length, and digital zoom just crops pixels.
For overhead flat-lay shots, build a simple DIY phone mount: a wire coat hanger bent into a stand, a $15 phone tripod, or a stack of cookbooks with a binder clip holding the phone at the right height. This frees up both hands to style the food.
How to Photograph Food in a Windowless or Dark Apartment
Basement apartments, interior rooms, and north-facing-only kitchens are a real challenge that forum users bring up constantly. If your home barely has any natural light, you still have options.
First, look for doorways and skylights. A glass-paneled door that opens onto a balcony gives you a usable light source even when no window is at the table. A skylight in the hallway above your kitchen is often overlooked but produces beautiful, soft, top-down light if you can position the food underneath.
Second, when natural light is genuinely impossible, a budget rechargeable LED panel from Amazon is the fallback that food bloggers actually use. Look for one with adjustable color temperature (3200K to 5600K) and a built-in diffuser. Place it on the opposite side of where the window would be and shoot at a lower ISO to compensate. The light quality is not as good as a real window, but it is consistent and controllable, which matters when you are shooting on a deadline.
Third, accept the dark apartment as a stylistic choice. Many successful food photographers shoot in low light on purpose for moody, dark-and-moody food photography. Embrace negative fill, lean into deep shadows, and you will find an aesthetic that feels intentional instead of compromised.
Common Mistakes to Avoid
Mixed lighting is the most common mistake. If your kitchen has warm overhead lights and cool daylight coming through the window, your camera cannot pick one color temperature and the food ends up looking orange on one side and blue on the other. Turn off every artificial light in the room when you shoot with window light, and use white balance to set the color you want.
On-camera flash is the second-biggest mistake. The small, harsh burst flattens texture, kills the soft quality of your window light, and creates ugly hot spots on shiny plates. Almost every food photography guide in existence tells you to turn the flash off, and for good reason.
Shooting toward the window without exposing for the food is the third mistake. Your camera sees the bright sky outside and underexposes the food, leaving it dark and muddy. Either expose for the food (tap to meter on the dish and lock exposure), pull a reflector in close to brighten it, or wait for cloud cover so the light inside and outside match.
The 5-Minute Light Test: Evaluate Any Window Before You Shoot
Before you pull out the camera, do a no-camera light test. Stand next to the window and put your hand on the table where the food will sit. Look at the shadow your hand casts. If the shadow is sharp and dark, you need more diffusion. If the shadow is soft and barely there, the light is ready.
Now hold a white piece of paper or a napkin where the food will go. Look at the paper. Is it a clean neutral white, or is there a color cast? A greenish cast usually means there are trees or grass outside the window. A warm orange or pink cast usually means wooden window frames or brick walls are bouncing colored light back. Adjust by hanging a white sheet over the offending element, or set a custom white balance on your camera to neutralize the cast.
Five minutes of this test before a shoot saves an hour of frustration editing later.
Frequently Asked Questions
What is the best light setup for food photography?
The best light setup for food photography is a window-side arrangement with three components: a window as the key light, a diffuser (sheer curtain, bedsheet, or 5-in-1 reflector) between the window and the food to soften the rays, and a reflector (white foam board or poster board) on the opposite side of the food to fill the shadows. This natural light food photography setup produces soft, dimensional light that flatters food without any studio gear.
What is the best setup for food photography?
The best setup for food photography is a small table or board placed within three feet of a window, with a translucent diffuser covering the window and a white foam board propped on the opposite side. Add a daylight white balance and an aperture around f/4 for single dishes or f/8 for flat-lay scenes, and you can shoot magazine-quality food photos with a phone or entry-level camera.
What are some tips for starting with food photography as a beginner?
Start by picking the window with the most indirect light in your home, usually a north-facing window or any window on an overcast day. Use a sheer curtain or white sheet as a diffuser, prop a white foam board across the table to bounce light into shadows, shoot at ISO 100 to 400 with the aperture around f/4, and turn off all overhead lights to avoid mixed lighting color casts. Shoot from the side first, then experiment with backlight and flat-lay angles as you get comfortable.
What is the best beginner camera for food photography?
For most beginners starting food photography in 2026, the camera you already own is enough. An iPhone 13 or newer, or any mirrorless camera released in the last five years, will produce excellent window-lit food photos. If you want to upgrade, look for a mirrorless camera with a flip-out screen (helpful for overhead shots), good low-light performance, and a 50mm or 35mm prime lens, which are the classic focal lengths for food work.
How do I photograph food in a dark apartment with no window?
Photographing food in a windowless apartment requires three workarounds: shoot near a glass-paneled door or skylight instead of a window, invest in a budget LED panel with adjustable color temperature to mimic daylight, or lean into the darkness and shoot moody, low-light food photography with negative fill and deep shadows. All three approaches produce usable images once you adjust your expectations and camera settings for the available light.
Do I really need studio lights for food photography?
No, you do not need studio lights for food photography. A natural light food photography setup built around a window, a diffuser, and a reflector will produce soft, flattering, professional-quality images for recipe blogs, Instagram, restaurant menus, and cookbook photography. Studio strobes and continuous lights become useful when you need to shoot at night, on overcast winter afternoons, or on a strict commercial deadline, but they are not required for most home food photography.
Conclusion
A natural light food photography setup with no studio is just three components: a window for your key light, a diffuser to soften harsh rays, and a reflector to lift the shadows. Once you have those in place, the only real decisions left are which direction to point the food and what time of day to shoot.
Pick your best window, hang a white sheet, prop a foam board across the table, and shoot your next recipe with your phone. You will be surprised how far that simple natural light food photography setup takes you in 2026.