
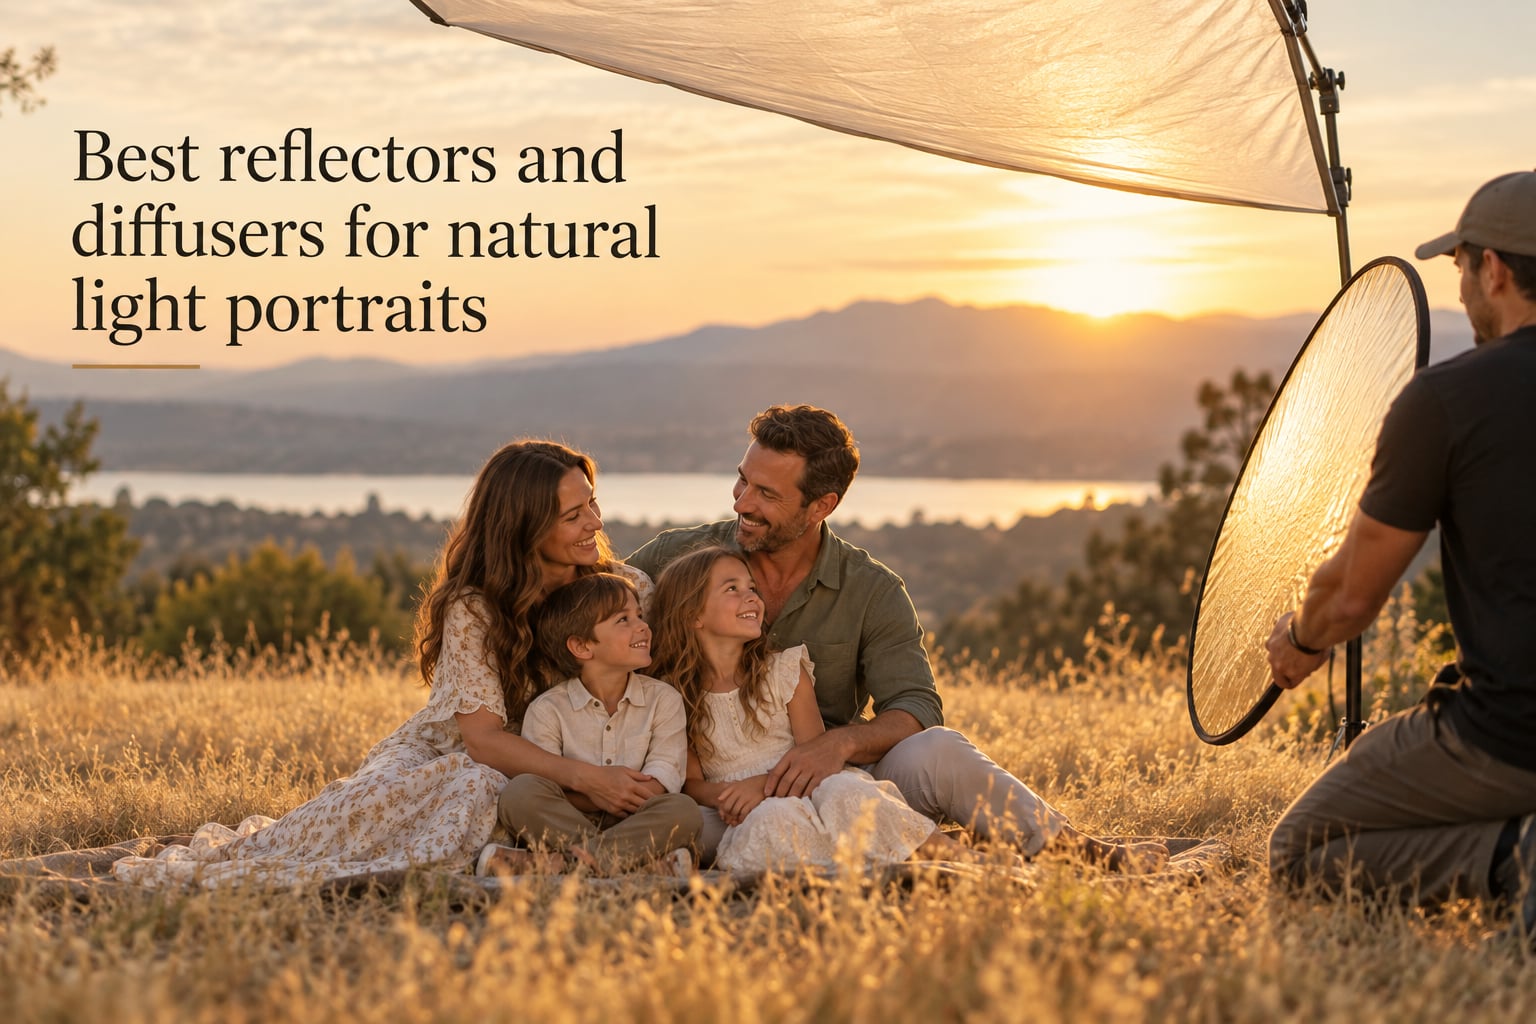
After ten years of shooting family portraits outdoors, I’ve watched more sessions transform from flat, shadow-heavy shots to glowing, dimensional portraits thanks to two simple tools: reflectors and diffusers for natural light portraits. These are the two light modifiers I pack before anything else, and once you understand how they work, you’ll wonder how you ever shot without them.
A reflector bounces existing light back onto your subject to fill in shadows. A diffuser is a translucent panel placed between the light source and subject to soften and spread the light. Together, they let you shape the sun, turn harsh midday rays into flattering glow, and produce consistent results whether you’re shooting headshots, couples, or full families. In this guide, I’ll walk you through the surfaces, angles, sizing, solo setup tricks, and common mistakes so you can master light without a single strobe.
Table of Contents
- Reflector vs Diffuser: What’s the Difference?
- Reflector Surfaces Explained: White, Silver, Gold, Black, Sunlight
- What Is a Diffuser and How Does It Soften Light?
- How to Position and Angle a Reflector for Portraits
- Diffusion Techniques: Taming Harsh Midday Sun
- Size Guide by Shoot Type: Headshots, Couples, Families
- Solo Photographer Setup: No Assistant, No Problem
- Common Mistakes to Avoid (and How to Fix Them)
- DIY Reflectors and Diffusers on a Budget
- Frequently Asked Questions
- What are the best light reflectors for photography?
- What is the best natural light setup for portrait photography?
- What is the difference between a reflector and a diffuser?
- What does a reflector do in photography?
- Which type of photography reflector should I use?
- Where is best to place a photography reflector?
- How do you use a diffuser for portraits?
- Do I really need a reflector for portraits?
- Final Thoughts: Mastering Light Without Strobes
Reflector vs Diffuser: What’s the Difference?
The short answer: a reflector adds light to your scene, a diffuser subtracts its harshness. Both work with whatever natural light you already have, no batteries or strobes required.
Think of a reflector as a bounce card. It catches the sun (or a window) and sends soft fill light back into the shadows on your subject’s face. A diffuser, by contrast, sits between the sun and your subject and spreads the light over a larger area, eliminating sharp shadows and squinting.
| Feature | Reflector | Diffuser |
|---|---|---|
| Purpose | Bounces light into shadows | Softens and spreads harsh light |
| Placement | Opposite the light source | Between the light source and subject |
| Effect on shadows | Fills them in | Reduces their contrast |
| Effect on highlights | Brings up the dark side | Prevents blown-out highlights |
| Best for | Side-lit or backlit subjects | Harsh midday sun, window light |
| Common shapes | 5-in-1 disc, flat panel | Translucent disc, 6×6 ft frame |
| Carries light? | Yes | No, blocks and spreads it |
You’ll often use them together. A typical outdoor setup: diffuser overhead to soften the sun, reflector low and opposite to bounce light back into the eyes. That’s a 2-reflector setup, and it’s the foundation of professional natural-light portraiture.
Reflector Surfaces Explained: White, Silver, Gold, Black, Sunlight
Most 5-in-1 reflectors include the same five surfaces. Each one does something different to the light, and choosing the right one is the difference between flattering skin tones and an unflattering orange tint.
White reflector is your everyday workhorse. It bounces a soft, neutral light that mimics natural fill. Use it any time you want subtle shadow lift, especially for fair skin, group shots, and window-light portraits where you don’t want to fight the color temperature.
Silver reflector is brighter and slightly cooler. It punches more light into deep shadows, which is helpful for high-contrast scenes or subjects with deep-set eyes. Be careful with fair or shiny skin. Too much silver too close blows out highlights fast.
Gold reflector warms the light and adds golden-hour tones to overcast or shaded shoots. It is gorgeous in moderation, but reviewers report it can quickly look orange on most skin tones if overused. Use it sparingly and farther from the subject.
Sunlight (or sunfire) is a mix of gold and silver. It gives warmth without going full orange, and it’s the surface I reach for most often during golden hour or when a scene feels too cool. It’s the “warm-but-not-mushroom” compromise.
Black reflector (a “flag” or negative fill) does the opposite of what you might expect. Instead of bouncing light, it absorbs it. Place a black surface on the bright side of your subject to deepen shadows and add dimension. It’s the secret to dramatic, sculpted portraits.
Translucent diffusion panel is the fifth surface on most 5-in-1 kits. Unzip the cover and the entire disc becomes a giant softbox. I’ll cover that in the diffuser section below.
What Is a Diffuser and How Does It Soften Light?
A diffuser is a translucent fabric panel that spreads direct light over a wider area. Sunlight travels in straight lines, which is why midday sun creates hard shadows under eyes, nose, and chin. Push that light through a diffuser and it scatters, mimicking the look of overcast sky or a softbox.
The most common diffusion strengths are 1-stop and 2-stop. A 1-stop diffuser softens light without changing exposure much, ideal for slightly harsh sun. A 2-stop diffuser cuts more light and is what you want for truly brutal midday conditions or when your subject is squinting.
Diffusers come in two main shapes: round discs (often part of a 5-in-1 kit) and large rectangular frames (6×6 ft or bigger). Round discs are portable and great for headshots. Big frames cover full families or couples standing together, and they let you shoot from underneath in true butterfly or clamshell setups.
How to Position and Angle a Reflector for Portraits
Place the reflector opposite your main light source, angled toward the shadow side of your subject’s face. If the sun is on their right, the reflector goes on their left, tilted up at roughly 45 degrees toward the cheek and jaw.
Distance matters more than most beginners realize. Start about two to three feet from your subject’s chest. Closer than that and the light becomes harsh and obvious (a giveaway “deer in headlights” look). Farther than four to five feet and you lose most of the fill effect.
Watch the catchlights. Catchlights are the bright reflections in your subject’s eyes, and they’re the visual cue that tells viewers “this is a professional portrait.” Round reflectors create round catchlights. Square panels create square ones. Either looks great, but match the shape to your mood. Round feels soft and classic; square feels editorial and modern.
For backlit subjects, where the sun is behind them and you’re shooting toward the light, place the reflector in front of them just below chest level. This bounces light back into their face and gives you that glowing rim-light effect popular in golden-hour portraits.
Diffusion Techniques: Taming Harsh Midday Sun
Midday sun (10 AM to 2 PM) is every outdoor portrait photographer’s nemesis. It casts raccoon eyes under brows and forces your subjects to squint. A diffuser solves both problems in seconds.
Step 1. Position your subject so the sun is at their 4 o’clock or 8 o’clock, slightly behind them. This gives you directional light without direct overhead rays.
Step 2. Have an assistant (or your stand setup) hold the diffuser between the sun and the subject’s face. The diffuser should be two to four feet above the subject, tilted down at the angle where the shadow disappears.
Step 3. Add a white reflector below the subject’s chin, opposite the sun, to bounce light back into the now-softened shadows.
Step 4. Shoot at a slightly lower ISO (100-200) and faster shutter (1/250 or higher) to keep skin tones clean. The diffused light is now much less harsh, so you have more flexibility.
That two-tool setup, diffuser above plus reflector below, is what pros call “bounce and diffuse.” It’s the cleanest, most flattering way to shoot in harsh sun, and it’s what most editorial outdoor portraits use.
Size Guide by Shoot Type: Headshots, Couples, Families
Choosing reflector size by shoot type is a question we get constantly from beginners, and no major competitor covers it well. Here’s the simple cheat sheet I share with our Sparkfly workshop attendees.
| Shoot Type | Reflector Size | Diffuser Size | Notes |
|---|---|---|---|
| Headshot / single subject | 22-32 inch disc | 32-42 inch disc | Easiest to manage solo |
| Couples / 2 people | 32-42 inch disc | 42 inch disc or 6×6 ft frame | Frame fills both faces evenly |
| Family of 4-5 | 42 inch disc or 4×6 ft panel | 6×6 ft frame | Larger surface prevents hot spots |
| Full-length / fashion | 6×6 ft frame or 8×8 ft | 8×8 ft overhead frame | Covers from head to toe |
| Newborn / small detail | 22 inch disc | Window diffuser | Smaller, controlled light |
When in doubt, go bigger. The 42-inch disc is the most versatile size for portrait work. It folds down to about 1/3 of its open size, fits in most camera bags, and handles everything from headshots to small families. We bought ours eight years ago and it’s still our most-used modifier.
Solo Photographer Setup: No Assistant, No Problem
The biggest complaint I hear from solo photographers: “I don’t have anyone to hold the reflector.” It’s a fair problem. Here are three solutions we use during solo family sessions.
Reflector stand + clamp. A standard light stand paired with a reflector clamp solves everything. The stand goes opposite the sun, the clamp grips the reflector handle, and you adjust the angle by tilting the clamp head. Look for a clamp with rubber pads to avoid scratching your reflector frame.
Sandbag the base. Outdoor breezes love to tip over reflector stands. A 5-15 lb sandbag on the base keeps it grounded. We also angle the stand so the reflector acts like a sail in crosswinds, never directly facing them.
Lean and prop. For headshots and tight portraits, you don’t always need a stand. Prop the reflector against a chair, your camera bag, or a low tree branch. We use this trick constantly for newborn sessions where everything needs to be quiet and minimal.
Reviewers on photography forums repeatedly confirm that a sturdy stand with a quality clamp is the single best investment a solo portrait photographer can make beyond the reflector itself.
Common Mistakes to Avoid (and How to Fix Them)
I’ve made every one of these mistakes in the last decade. Here are the ones that show up most often in beginner portraits and how to fix them fast.
Mistake 1: Bouncing from the same side as the sun. If the sun is on the subject’s right and you put the reflector on their right too, you’re adding to the bright side, not filling the shadow. Move the reflector to the opposite side.
Mistake 2: Reflector too close. A reflector 6 inches from the face creates harsh, hot, unnatural light. Back up until the fill looks like ambient bounce, not a flash. Two to three feet is usually the sweet spot.
Mistake 3: Reflector too low or too high. Aim for the cheekbone and jawline, not the forehead (overhead) or the chin (under-bounce). The angle of light on the face changes everything.
Mistake 4: Using gold for everything. Gold reflector can quickly make skin look orange or jaundiced. Reserve gold for cool, overcast conditions or when you specifically want that warm golden-hour feel. Otherwise stick to white or sunlight.
Mistake 5: Forgetting negative fill. New photographers add light when they should subtract it. If your subject looks flat, place a black surface on the bright side instead of a white one. The shadows deepen and the portrait suddenly has dimension.
DIY Reflectors and Diffusers on a Budget
You don’t need to spend a fortune to start. Foam board from any craft store (white side out, black side as negative fill) makes a great emergency reflector for headshots. A white bedsheet or sheer white curtain stretched over a PVC frame works as a diffuser. We’ve used both on real client sessions.
The catch with DIY: they don’t fold, they break in wind, and they don’t last. Photographers on Reddit and photography forums confirm that foam-core warps within a season of outdoor use. Treat DIY as a learning tool, then upgrade to a proper 5-in-1 kit once you know which surfaces you’ll actually use.
If you only buy one thing, buy a 5-in-1 collapsible disc in the 32-42 inch range. It includes every surface you’d need for portrait work, folds to one-third size for transport, and runs a fraction of the cost of separate rigid reflectors.
Frequently Asked Questions
What are the best light reflectors for photography?
A 5-in-1 collapsible reflector in the 32-42 inch range is the most versatile choice for portrait photographers. It includes white, silver, gold, sunlight, and translucent diffusion surfaces in one kit. White and sunlight surfaces handle 80% of natural-light portraits. Add a sturdy stand and clamp if you shoot solo.
What is the best natural light setup for portrait photography?
For outdoor portraits, position your subject with the sun at a 45-degree side angle. Place a diffuser between the sun and subject to soften harsh light, then add a white reflector opposite the sun to fill shadows. This 2-tool setup creates flattering, dimensional light without strobes or speedlights.
What is the difference between a reflector and a diffuser?
A reflector bounces existing light back onto your subject to fill in shadows. A diffuser is a translucent panel placed between the light source and subject to soften and spread the light. Reflectors add light; diffusers subtract harshness. Most portrait photographers use both together for the cleanest results.
What does a reflector do in photography?
A reflector catches light from the sun or another source and bounces it back into the shadow areas of your subject. It fills in dark patches under the eyes, nose, and chin, balances harsh contrast, and adds a flattering catchlight to the eyes. Reflectors let you shape existing light without adding any artificial source.
Which type of photography reflector should I use?
Use a white reflector for soft, neutral fill on most portraits. Use silver for high-contrast scenes where you need punch. Use gold sparingly for adding warmth on cool or overcast days. Use sunlight (gold-and-silver mix) for warm-but-not-orange golden-hour tones. Use a black reflector (negative fill) to deepen shadows and add drama.
Where is best to place a photography reflector?
Place the reflector opposite your main light source, angled toward the shadow side of your subject’s face at roughly 45 degrees. Distance should be 2-3 feet from the chest for natural-looking fill. For backlit subjects, place the reflector in front and slightly below chest level to bounce light back into the face.
How do you use a diffuser for portraits?
Position the diffuser between the sun and your subject, 2-4 feet above them, tilted down at the angle where harsh shadows disappear. Add a white reflector below the chin, opposite the sun, to fill the now-softened shadows. This bounce-and-diffuse method is the standard professional technique for harsh midday light.
Do I really need a reflector for portraits?
Yes, if you shoot outdoors in any condition other than fully overcast. A reflector transforms harsh side-lit, backlit, and contrasty scenes into balanced, flattering portraits. Many photographers consider a 5-in-1 reflector the single highest-value piece of gear they own, more important than a new lens for portrait work.
Final Thoughts: Mastering Light Without Strobes
Reflectors and diffusers are the closest thing to a magic wand in natural-light portrait photography. They cost little, weigh almost nothing, and completely change how your images look. Every portrait session, family, couples, or solo headshots, benefits from at least one of them.
Start with a 32-42 inch 5-in-1 collapsible reflector and a basic light stand with a clamp. Learn white and sunlight surfaces first. Add a translucent diffusion panel once you’re comfortable with positioning. From there, the work is practice. Take the same portrait in midday sun, golden hour, and open shade, and watch how a single reflector changes the result each time.
The best part of mastering reflectors and diffusers for natural light portraits is that you’ll never be at the mercy of bad weather or harsh sun again. The light is already there; you just need to know how to move it.