
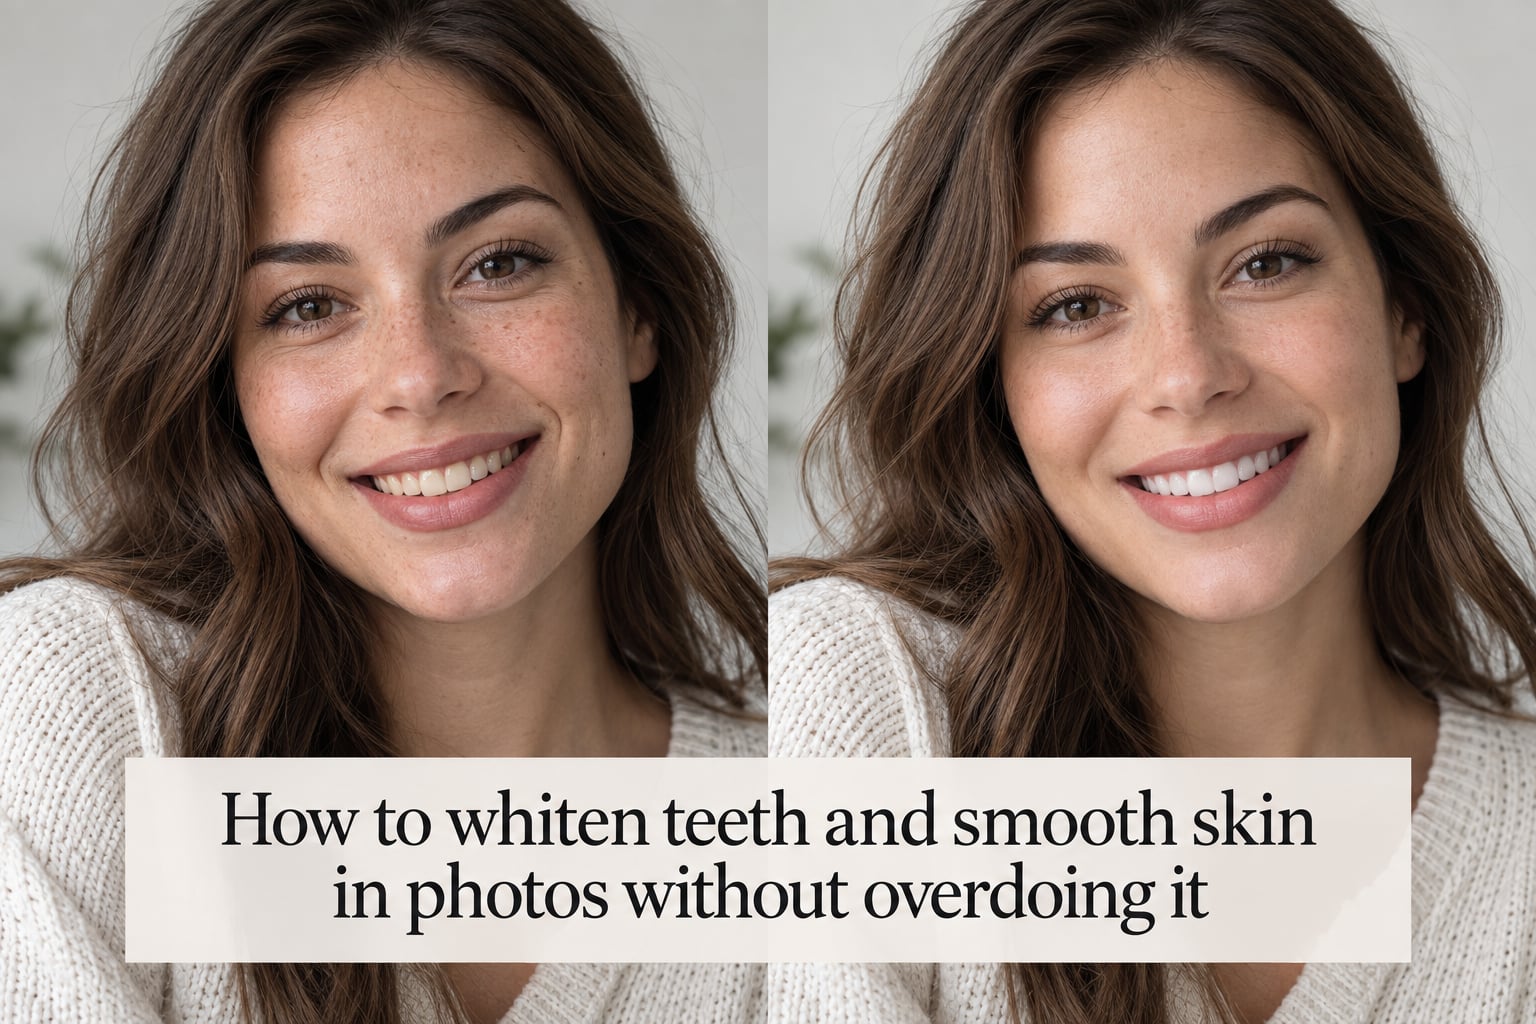
Every portrait photographer runs into the same two problems on every shoot: yellow teeth and uneven skin. Whiten the teeth too far and they look like glowing marshmallows. Smooth the skin too aggressively and your client walks onto set looking like a mannequin. I have shipped thousands of family, headshot, and wedding photos over the years, and the edits that hold up on a 16×20 print and on a 200-pixel Instagram thumbnail share one thing in common – they look like the best version of the subject, not an obvious Photoshop job.
This guide is the workflow I wish I had on day one. You will learn how to whiten teeth and smooth skin in photos without overdoing it, using Lightroom and Photoshop in a way that keeps enamel texture and skin pores intact. I will give you specific slider values, a single combined masking pass that handles both jobs, a cheat sheet for natural versus overdone results, and a verification checklist so you never ship a plastic-looking edit. Whether you are a working portrait studio or a parent touching up a graduation photo, this is the entire workflow in one place.
Table of Contents
- Why Teeth and Skin Pick Up Color Casts in Photos
- Step-by-Step Workflow for Whitening Teeth in Lightroom
- How to Whiten Teeth in Photoshop for Tough Cases
- Step-by-Step Workflow for Smoothing Skin Without the Plastic Look
- Combining Teeth and Skin Edits in One Masking Pass
- The Slider Value Cheat Sheet for Natural vs Overdone Results
- Common Overediting Traps and How to Fix Them
- Verification Checklist at Multiple Zoom Levels
- Talking to Clients About Retouching Expectations
- Online and Mobile Alternatives to Photoshop
- Frequently Asked Questions
- How to make teeth appear whiter in photos?
- How to get rid of yellow teeth in pictures?
- How do I fix yellow teeth in Lightroom?
- Why do teeth look gray after editing?
- How do you fix glowing teeth in a photo edit?
- How to smooth skin without losing texture?
- Should you whiten heavily stained teeth for a client?
- A Natural-Looking Edit Is a Balanced Edit
Why Teeth and Skin Pick Up Color Casts in Photos
Teeth and skin react to light differently, which is exactly why a global white balance fix never solves either problem. Teeth are small, slightly translucent surfaces that act like tiny reflectors. Whatever ambient color is in the room – the warm orange of tungsten lights, the green bounce off grass, the magenta wash from a hotel ballroom – shows up directly on the enamel.
Skin, on the other hand, absorbs and scatters light. The same warm cast that paints teeth yellow gives skin an orange or sallow look that the eye reads as tired. Global white balance tries to neutralize the average, but your subject is not the average. A photo can look perfectly neutral on the histogram and still have obviously yellow teeth.
The fix is targeted. You mask the teeth, treat the teeth. You mask the skin, treat the skin. The rest of the frame stays exactly where your base edit left it. Once you accept this, every retouching problem on a portrait gets dramatically easier.
Step-by-Step Workflow for Whitening Teeth in Lightroom
The fastest way to whiten teeth in Lightroom is a targeted mask plus three small adjustments. Done correctly, this takes under a minute per photo and produces a result nobody notices was edited. Here is the exact order I follow.
- Finish the base edit first. Set exposure, white balance, and tone curve for the whole image. Teeth edits look wrong on a photo that is not yet color-corrected because your eye cannot tell whether the teeth are off or the entire photo is off.
- Open the Masking panel and pick Subject, then refine it with a Subtract brush over lips and gums. Lightroom’s subject detection is good, but it bleeds onto lips roughly one photo in three. Zoom to 100 percent and trace the gumline with the Subtract brush.
- Inside the mask, drop Saturation by roughly -36 to -60. This kills the yellow without touching the white. Teeth that look brown or stained need the bigger drop; teeth that are just slightly creamy need the smaller drop.
- Add a small Exposure lift of about +0.3 to +0.5. Anything more than +0.7 starts to glow.
- Pull Temp slightly toward blue, around -5 to -10 on the slider. This is the secret step. A tiny cool shift plus the saturation drop reads as a clean white, while a big exposure lift alone reads as fake.
The order matters. Saturation first, then exposure, then temperature. If you reverse the order you fight your own edits and end up doubling a slider that should have stayed small. Verify at 100 percent zoom that you can still see faint vertical enamel lines and the slight translucency near the gumline. If those are gone, you went too far.
How to Whiten Teeth in Photoshop for Tough Cases
Lightroom handles most teeth edits. For heavily stained, brown, or composite-restoration teeth, Photoshop gives you finer control. The workflow is also non-destructive, which matters when a client wants a second pass.
- Duplicate the base layer and name it “Teeth.”
- Add a Hue/Saturation adjustment layer clipped to “Teeth.” Pull Master Saturation down to about -50 and shift the Yellow channel two clicks toward green.
- Add a Curves adjustment layer clipped to “Teeth.” Lift the middle of the curve by about 5 to 8 percent. Avoid the highlights – this is the part that makes teeth glow if pushed too far.
- Add a layer mask to the Curves layer, paint black over everything except the teeth, and use a soft white brush at 30 percent opacity to brush over the brightest stains only.
- Use the Dodge tool on a soft round brush at 5 percent exposure to add a tiny bit of specular highlight to the two front teeth. This is what makes a smile read as alive.
The Dodge pass is where most editors overdo it. A real tooth has highlights that are already in the source image. Your job is to add a half-stop, not to repaint the tooth. If the highlight looks like a sticker, you are done.
Step-by-Step Workflow for Smoothing Skin Without the Plastic Look
Skin retouching is where the plastic look comes from, and the cause is almost always the same: people use a blur tool over the entire face. Blur removes pores along with blemishes, and pores are what tell the brain “this is a real face.” The fix is frequency separation, which lets you smooth tone while keeping texture untouched.
- Duplicate your base layer twice. Name the bottom one “Low” and the top one “High.”
- On the “Low” layer, go to Filter > Blur > Gaussian Blur. Set the radius high enough that all fine detail vanishes – usually around 8 to 12 pixels for an 18-megapixel image. Click OK.
- On the “High” layer, go to Image > Apply Image. Set Layer to “Low,” Blending to Subtract, Scale to 2, Offset to 128. Click OK. Change the High layer’s blend mode to Linear Light.
- You now have two layers: a smooth tone layer and a pure texture layer. Take the Healing Brush or Clone Stamp on the Low layer to fix dark spots, redness, and under-eye circles.
- On the High layer, paint with a soft black brush at low flow to gently reduce the appearance of pores you want softened. Avoid the cheeks in men, the tip of the nose, and any area where pores are a defining feature.
- Flatten when finished, or merge the two frequency layers into a single non-destructive smart object for batch work.
The trick that separates studio retouching from amateur retouching is leaving texture behind. A 100 percent face with all pores removed is instantly recognizable as fake. A 100 percent face where the under-eye is even and a few freckles remain is the goal.
Combining Teeth and Skin Edits in One Masking Pass
This is the part nobody teaches, and it is the part that saves the most time. Once you understand that teeth and skin are independent surfaces that both need targeted work, you can build a single subject mask that covers both and use separate adjustment layers on top of it.
In Lightroom, create one Subject mask. Inside the mask, use the Intersect feature to keep only the face. From there, you can add local adjustments that affect only the face: a small texture reduction for skin, plus the teeth edits from the previous section, all on the same mask. The skin edits stay inside the face oval; the teeth edits stay inside the teeth. Neither bleeds onto the lips, the eyes, or the background.
In Photoshop, build a single Curves adjustment layer with a face mask, then nest two clipped adjustment layers underneath it – one for teeth and one for skin. The order matters: skin first, then teeth, then the master tone curve. This keeps your edit history short, your file size small, and your changes easy to revise when the client calls asking for “just a touch less smoothing.”
The Slider Value Cheat Sheet for Natural vs Overdone Results
The number-one question photographers ask is “how much is too much.” Here is the cheat sheet I keep taped to my monitor. These values are starting points for a properly exposed portrait at 100 percent zoom. Adjust up or down based on the source.
| Adjustment | Natural Range | Subtle / Professional | Overdone (Stop Here) |
|---|---|---|---|
| Teeth Saturation | -20 to -40 | -40 to -60 | Beyond -70 |
| Teeth Exposure | +0.2 to +0.4 | +0.4 to +0.6 | Above +0.8 |
| Teeth Temperature | -3 to -7 | -7 to -12 | Beyond -15 |
| Skin Texture | +5 to +10 | +10 to +20 | Above +30 |
| Skin Clarity | -5 to -10 | -10 to -20 | Below -25 |
| Skin Dehaze | 0 to -3 | -3 to -7 | Below -10 |
| High Frequency Blur Radius | 8 px | 10 to 12 px | Over 15 px |
| Dodge Tool Exposure | 3 percent | 5 percent | Above 10 percent |
If your value sits in the Subtle column, you are at the studio level. If it sits in the Overdone column, your client will notice. The slider you cannot find on this chart is the most important one: the Undo button. Use it generously.
Common Overediting Traps and How to Fix Them
Every retouching mistake has a name and a fix. These are the four I see most often in client files sent in for rescue edits.
Glowing teeth: The single biggest exposure lift on the teeth layer is over +0.8, and the saturation drop was not applied first. Pull exposure back to +0.4, redo the saturation drop, and use a soft brush to mask out the brightest edges where light naturally wraps around the enamel.
Gray teeth: A saturation drop too far – usually beyond -70 – turns teeth flat and lifeless. The fix is to back the saturation up to about -45 and lift the yellow channel by +5 to add warmth back. Teeth that are pure white look like a wax model; teeth that are slightly warm-white look like real enamel.
Plastic skin: Almost always caused by using a softening tool or frequency separation across the whole face at high strength. Reset by undoing the texture reduction and re-applying frequency separation at a lower radius. Keep the high-frequency layer at full strength and reduce only where pores are distracting, not everywhere.
Loss of pores in beauty shots: Some clients genuinely want flawless skin, and that is a valid creative choice. The fix is not to skip skin retouching; the fix is to tell the client what they are asking for. Airbrushed skin looks like airbrushed skin. If that is what they want, deliver it. Just make sure it is a decision, not an accident.
Verification Checklist at Multiple Zoom Levels
An edit that looks subtle at 100 percent zoom can look heavy at fit-to-screen. An edit that looks invisible at thumbnail size can look obvious on a printed 8×10. Verification at multiple zoom levels is the single step most home editors skip, and it is the step that separates a polished file from one the client notices.
- Zoom to 100 percent. Check that you can still see enamel lines on the teeth and pores on the cheeks. If you cannot, you overdid it.
- Zoom to 50 percent. This is roughly how the image will look on a phone. Check that skin and teeth look balanced against the rest of the frame.
- Zoom to fit-screen. This is the viewing size most clients will use. Check overall mood and color. The teeth should look bright but not loud. Skin should look even but not flat.
- Use the back-and-falt before-and-after shortcut to flip between the original and the edited version three times quickly. The goal is that the change registers as “a touch brighter” and “a touch smoother,” not as “different person.”
- Export a small JPEG and view it on your phone. Phone screens are harsher than calibrated monitors. If it survives the phone, it will survive the print.
If a single step fails, go back to the edit. Do not ship a file that only looks right at one zoom level. Real edits look right at all of them.
Talking to Clients About Retouching Expectations
The hardest part of retouching is not the technical slider. It is the conversation before the shoot. Photographers on Reddit and photography Facebook groups regularly ask how to handle clients who want heavy edits or who are surprised when their real teeth do not match the edited photo. The answer is to set the expectation on the consultation call.
Show two or three before-and-after samples from previous shoots that match the client’s request – natural, light, or heavy. Walk them through what is changing in each sample. Make it clear that the final image is the best version of them, not a different person. If a client asks you to fix something the camera cannot fix in-camera, like extremely yellow or brown teeth that come from years of staining, be honest about what is realistic and what crosses into misrepresentation.
The studio policy that has worked for our team: we will not edit a subject’s features to a point where they would not recognize themselves in person. We will smooth skin, brighten teeth, remove temporary blemishes, and clean up stray hairs. We will not change face shape, eye size, or body proportions. Setting that line on day one saves awkward conversations on delivery day.
Online and Mobile Alternatives to Photoshop
If you do not have Photoshop, or you are doing a one-off edit on a phone, several online and mobile apps handle the same workflow in a simpler way. None of them match Photoshop’s fine control, but for quick touch-ups they are good enough.
Lightroom Mobile has the same Masking panel as the desktop version, including the Subject mask. Teeth and skin edits transfer between mobile and desktop when you sync to the cloud, which makes it the easiest professional option for travel.
CapCut has a one-tap White Teeth slider inside its Retouch tools. It is fast, and it works on phone shots and short-form video. The downside is that the slider is global, so it can affect lips if the mask is not perfect.
Fotor and BeFunky both offer a Teeth Whitening tool in their portrait retouching suite. They are browser-based, free to try, and good for a quick LinkedIn or social post where perfection is not the goal.
The honest answer to “is teeth whitening online really free” is yes for the basic version, and paid for the higher-resolution export. The honest answer to “is it safe to use online editors” is that you are uploading your photo to a third-party server, so do not use them for confidential client work.
Frequently Asked Questions
How to make teeth appear whiter in photos?
Mask the teeth with a targeted Subject or brush mask, drop Saturation by about -36 to -60 to remove yellow, lift Exposure by +0.3 to +0.5, and shift Temp slightly cool by -5 to -10. Verify at 100 percent zoom that enamel lines and gumline translucency are still visible. These small combined adjustments look bright without going fake.
How to get rid of yellow teeth in pictures?
Yellow comes from ambient color temperature, not the tooth itself. Lower the yellow saturation on a targeted mask, add a small exposure lift, and shift temperature slightly toward blue. For heavily yellow or brown teeth, do the same workflow in Photoshop on a duplicated layer so you can mask more aggressively without affecting the rest of the image.
How do I fix yellow teeth in Lightroom?
Open the Masking panel, choose Subject, subtract lips and gums with a brush, then drop Saturation by about -40 to -60 and lift Exposure by +0.3 to +0.5. Shift Temp slightly toward blue. Finish by checking at 100 percent zoom to confirm enamel texture is intact.
Why do teeth look gray after editing?
Teeth look gray when saturation is dropped too far or when a cool temperature shift is applied on top of an already low-saturation layer. The fix is to back saturation up to around -45 and lift the yellow channel by +5 to bring warmth back. Pure white teeth look like wax; slightly warm teeth look like real enamel.
How do you fix glowing teeth in a photo edit?
Glowing teeth come from exposure above +0.8 without a paired saturation drop. Pull exposure back to +0.4, redo the saturation reduction, and use a soft brush to mask out the brightest edges. If a single tooth still glows, reduce its exposure locally with a radial mask.
How to smooth skin without losing texture?
Use frequency separation in Photoshop: duplicate the base into a Low layer with Gaussian Blur around 8 to 12 pixels and a High layer set to Linear Light. Smooth tone on the Low layer with the Healing Brush, then reduce pore visibility on the High layer only where it matters. Leave cheeks, nose tip, and any texture-defining area untouched.
Should you whiten heavily stained teeth for a client?
Set expectations on the consultation call. Show before-and-after samples and walk the client through what is changing. Most photographers will whiten moderately yellow teeth, but will not edit features to a point where the client would not recognize themselves in person. Heavy staining that comes from years of wear is best handled honestly, not retouched into something the client did not ask for.
A Natural-Looking Edit Is a Balanced Edit
If you remember nothing else from this guide, remember the texture rule. Real teeth have enamel lines and gumline translucency. Real skin has pores and freckles. The moment those disappear, the photo stops looking like a portrait and starts looking like a render. Every slider you touch should be evaluated against the question “is the texture still there?” If the answer is no, undo one step and try again.
The combined workflow – one subject mask, targeted teeth edits, frequency separation for skin, verification at three zoom levels, and a clear conversation with the client – is the system our studio has used across thousands of family sessions, headshots, and weddings. It works because it treats the face as a face, not as a surface to be flattened.
Start with the Lightroom teeth workflow on your next session. Once that feels fast, add the skin workflow in Photoshop. Once that feels fast, build the combined single-mask pass. Within a few sessions, the workflow will be faster than the old way of doing global adjustments and hoping for the best. Your job is to make the photo look like the best version of the subject, and now you have the full toolkit to do exactly that.