
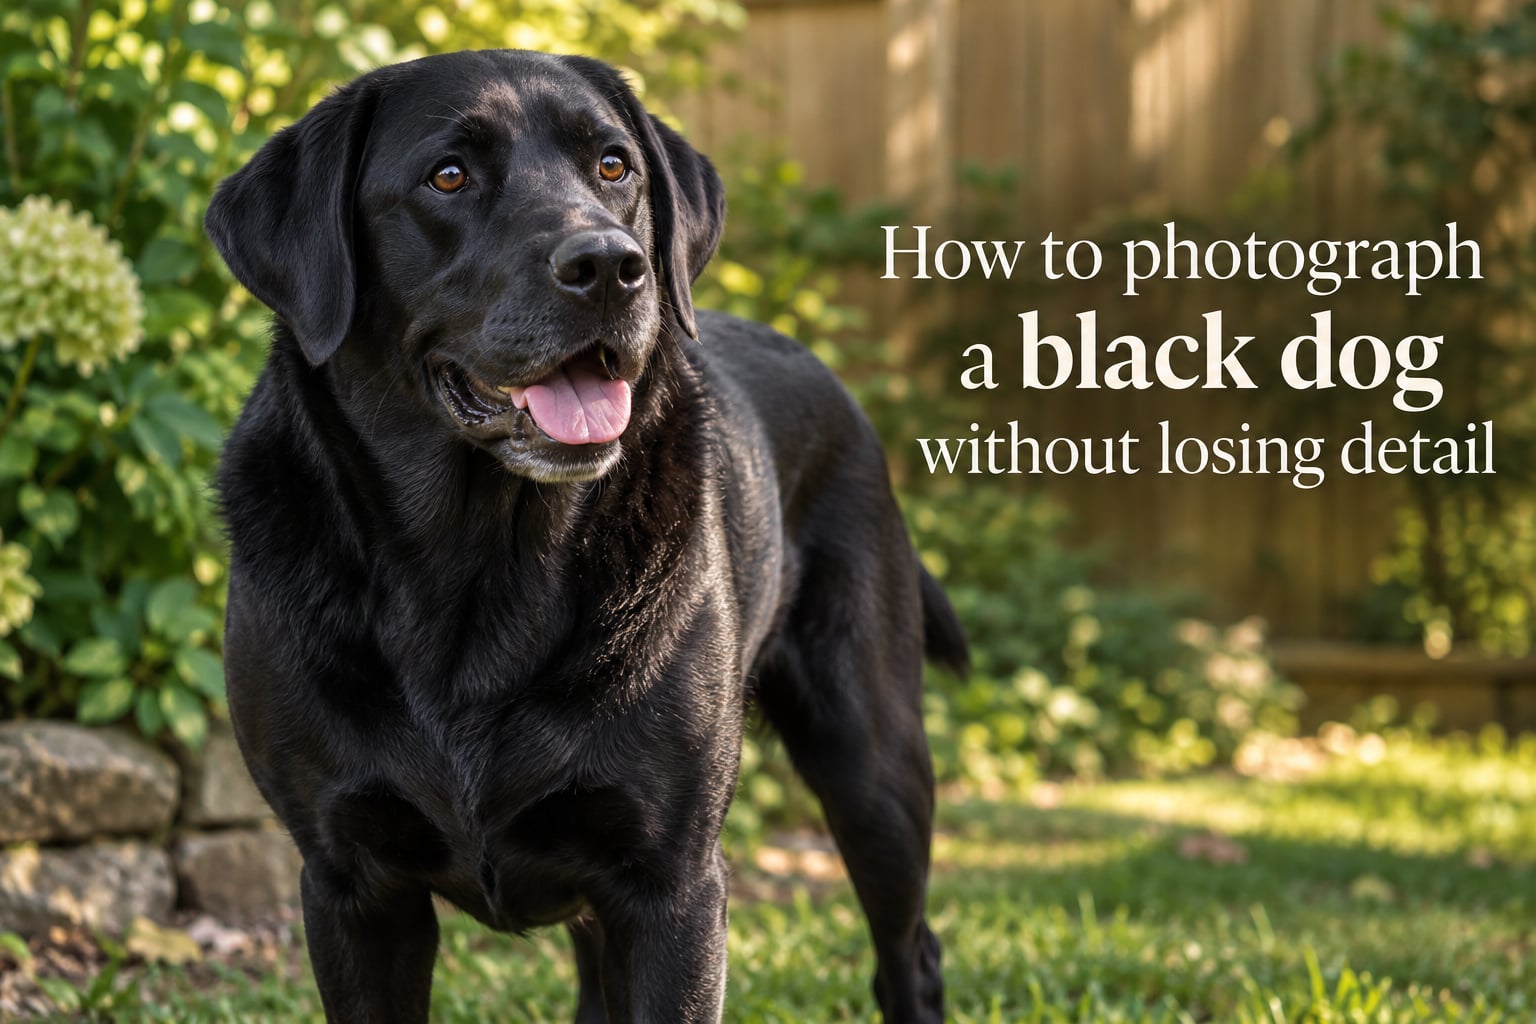
Black dogs are some of the hardest subjects to photograph well. The camera’s light meter sees all that dark fur and tries to brighten it, and what you get is a featureless silhouette – the dreaded “black blob” where texture, eyes, and personality disappear. Our team has photographed dozens of black Labradors, Poodles, and rescue mixes in our studio, and the same handful of techniques solves the problem on every shoot. This guide shows you how to photograph a black dog without losing detail, whether you’re using a DSLR, a mirrorless camera, or just your iPhone.
Inside, you’ll find a quick answer you can apply today, the lighting fundamentals that make the biggest difference, our editing workflow, and a checklist of mistakes that turn black dogs into black holes.
Table of Contents
- Quick Answer: 7 Steps to Photograph a Black Dog Without Losing Detail
- Why Black Dogs Turn Into Black Blobs in Photos
- Lighting Fundamentals for Photographing Black Dogs
- Light Direction: Where the Sun Should Hit the Face
- Backgrounds and Contrast for Black Dogs
- Catchlights and Visible Eyes
- Camera Settings: Aperture, Exposure, ISO
- iPhone and Smartphone Photography for Black Dogs
- Fill Flash and Silhouette Techniques
- Editing Workflow for Black Dog Photos
- Common Mistakes to Avoid
- Puppies, Adults, and Energetic Dogs
- Frequently Asked Questions
- Final Thoughts: Photographing Black Dogs With Confidence
Quick Answer: 7 Steps to Photograph a Black Dog Without Losing Detail
If you only have 60 seconds, here is the exact process we use. These are the techniques that turn black blobs into visible dogs:
- Shoot in soft, directional light. Choose shade, an overcast sky, or the hour before sunset. Harsh midday sun turns dark fur into a flat silhouette.
- Place the dog so light hits the face. Aim for light coming from a 45-degree angle to one side, not straight on and not from behind.
- Use a mid-tone background. Greens, warm browns, soft creams, or muted blues all separate black fur from the scene. Pure white and pure black backgrounds are the worst options.
- Underexpose by one to two stops. Tell the camera the scene is darker than it thinks. This keeps the fur rich and prevents the gray “smurf dog” look.
- Focus on the nearest eye. Tap to expose and lock on the eye. Modern phones and cameras have eye detection – turn it on.
- Add fill flash or a reflector if the face is too dark. A small burst of light at 45 degrees reveals catchlights and brings out the eyes without flattening the fur.
- In editing, lift shadows selectively on the dog only. Use a mask in Lightroom, Snapseed, or your phone’s built-in editor to brighten the fur without washing out the rest of the scene.
Why Black Dogs Turn Into Black Blobs in Photos
The “black blob” problem starts inside your camera, not in your editing app. Every camera has a built-in light meter that tries to render the average scene as a balanced mid-gray. When a large dark subject fills most of the frame, the meter panics and over-brightens the image to “fix” what it sees as underexposure. The result: rich black fur becomes muddy gray, facial features vanish, and the eyes lose all definition.
Add to that the way cameras focus. Contrast-detection autofocus and many phase-detection systems hunt for edges and texture. A smooth black coat against a darker background gives the autofocus system almost nothing to lock onto, which is why reviewers report missed shots and soft faces. Reddit users in r/photography describe this exact issue: the dog’s face comes out dark, the body is fine, and the eyes are unreadable.
The fix is to take control of three things – the light on the face, the exposure reading, and the contrast between the dog and the background. The rest of this guide walks through each one.
Lighting Fundamentals for Photographing Black Dogs
Light is the single most important variable when photographing dark fur. Our team has learned that the goal is not “more light” but “better-placed, softer light.” Here is how to pick the right light in any condition.
Soft Light vs Harsh Light
Soft light wraps around the subject and creates gentle shadows that define the shape of the face. Harsh light creates sharp shadows and bright highlights, which on black fur look like black patches on black patches – no detail at all. Soft light comes from large light sources: an overcast sky, a wide window, an open doorway, or shade from a building. Harsh light comes from a small, direct source: the midday sun, a bare on-camera flash, or a single spotlight.
Golden Hour
The hour after sunrise and the hour before sunset produce warm, directional, naturally soft light. Position the dog so the sun grazes the side of the face, never straight on. Golden hour is also when your camera’s dynamic range is most forgiving, which means more recoverable detail in the shadows.
Overcast Days
An overcast sky acts like a giant softbox. The entire sky becomes one enormous, even light source, which is ideal for capturing fur texture. On cloudy days, you can shoot from almost any angle and still get visible detail in the face. This is the easiest condition for beginners.
Open Shade
Shade under a tree or next to a building gives you soft, directional light without the brightness of direct sun. Look for shade that opens toward the sky on the side where the dog will face. Avoid deep shade under a dense canopy, which can leave the dog looking flat and cool-toned.
Light Direction: Where the Sun Should Hit the Face
Where the light comes from changes the entire mood and detail level of the photo. For black dogs specifically, face-on light is your friend; backlight is almost always your enemy.
Side light (45 degrees). This is the classic portrait angle. Light rakes across the fur and creates a gradient from lit to shadowed, which defines the shape of the face and brings out the eyes. Most of our favorite black dog portraits use this setup.
Face-on light. Light coming from behind the photographer, hitting the dog’s face directly, flattens the features but produces the most catchlights in the eyes. Use this when you need the eyes to be the clear focal point.
Overhead light. Midday sun creates raccoon eyes and dark shadows under the chin. Avoid it unless you have a way to bounce light back into the face, like a reflector held low.
Backlight. Light coming from behind the dog is beautiful for golden retriever silhouettes but almost always turns a black dog into a featureless shape. Skip it unless you are deliberately going for a silhouette shot.
Backgrounds and Contrast for Black Dogs
The background is half the battle. A black dog on a black background disappears, no matter how good your lighting is. The fix is contrast at the edges where fur meets scene.
Mid-tone colors work best because they are light enough to separate from the fur but dark enough to keep the overall mood. Our top picks:
- Soft greens – grass, leafy bushes, painted fences. Greens that are not too bright or too saturated give clean separation.
- Warm browns – wood fences, brick walls, autumn leaves. Browns echo natural dog colors and feel cohesive.
- Cream and beige – stucco walls, sandy beaches, neutral blankets. These add warmth and make the dog pop without competing for attention.
- Muted blues – overcast skies, denim, faded painted doors. Cool tones balance the warm tones in the fur.
Avoid pure black, pure white, and very bright neon colors. Pure black swallows the dog. Pure white forces the camera to underexpose the dog even more. Bright neons introduce color cast on the fur. If you want to use a bright color, place the dog slightly off-center and let the background fall slightly out of focus so it acts as a wash, not a wall.
Catchlights and Visible Eyes
Catchlights are the bright reflections you see in the eyes of a well-lit subject. On a black dog, catchlights are often the only thing that makes the eyes readable at all. Without them, the eyes blend into the fur and the photo loses its soul.
To create catchlights, you need a light source that the dog can see – that is, a source positioned where the dog’s eyes can reflect it. Window light from the front, an open doorway, or a small bounce card all create a soft catchlight. On-camera flash pointed straight at the dog creates a harsh, centered catchlight that looks unnatural. Aim the flash at 45 degrees instead, or use a reflector to bounce ambient light into the eyes.
Eye detection matters here. Most cameras made after 2026 and every modern iPhone can lock focus on a detected eye. Turn the feature on, position the nearest eye in the center of the frame, and half-press the shutter to lock focus before recomposing. If your camera hunts back and forth, tap a brighter part of the face (the bridge of the nose, the brow ridge) to give the autofocus something to grab.
Camera Settings: Aperture, Exposure, ISO
You do not need a professional camera to get great results, but you do need to leave auto mode. Here is the exposure strategy we teach in our studio sessions.
Set a Wide Aperture for Separation
An aperture of f/2.8 to f/4 is the sweet spot for pet portraits. It blurs the background enough to separate the dog from the scene and lets in enough light to keep the ISO low. On a kit lens or a phone, just zoom in slightly to get a similar effect; the longer focal length adds natural background blur.
Underexpose by One to Two Stops
This is the single most important setting change. In manual mode, dial in -1 to -2 stops of exposure compensation. In aperture priority or program mode, use the exposure compensation dial the same way. The goal is to keep the fur reading as dark fur, not gray fur. You can always lift the shadows later; you cannot easily put detail back into blown highlights.
Keep ISO Low
Use the lowest ISO your lighting allows – typically ISO 100 to 400 outdoors, 800 to 1600 indoors. Higher ISO adds noise, and noise shows up first in the dark areas of the image, which is exactly where the black dog’s detail lives.
Shoot in RAW
RAW files record far more shadow detail than JPEGs. A RAW file that looks too dark on the back of the camera can usually be lifted two to three stops in editing without losing quality. A JPEG that is too dark is gone forever.
Watch the Histogram
The histogram is the graph that shows how many pixels sit in each brightness range. For a black dog, you want most of the pixels clustered on the left (shadow) side, with a small tail extending toward the middle. If the histogram bumps against the right edge, your highlights are blown and you need to reduce exposure.
iPhone and Smartphone Photography for Black Dogs
Most of the searches related to this topic include the word “iPhone,” and for good reason – the phone in your pocket is more than capable if you use it right.
Tap to Expose on the Face
Open the camera app, frame the dog, then tap and hold on the face. A yellow box appears with a small sun icon. Drag the sun icon down to darken the image. The phone will adjust the entire scene to make the face a bit darker, which is exactly what you want for black fur.
Lock Exposure and Focus
On iPhone, a long press locks both exposure and focus (AE/AF Lock). On most Android phones, the same long press does the same thing. Lock the exposure on the face, then reposition the dog in the frame. This prevents the camera from re-reading the scene every time the dog moves.
Use the 2x or 3x Lens If You Have It
The telephoto lens compresses the background and adds natural blur. It also puts more distance between you and the dog, which often makes the dog calmer and more cooperative. For black dogs especially, the telephoto lens produces a much cleaner separation from the background.
Turn On Portrait Mode
Portrait mode uses software to simulate a wide aperture. It adds background blur that helps a black dog pop. Watch the edges of the fur, though – software blur sometimes struggles with fine hair and may produce a soft halo.
Fill Flash and Silhouette Techniques
When natural light is not enough, flash and silhouette are your two creative escapes.
Fill-In Flash
Fill flash is a small burst of light used to brighten shadows, not the entire scene. On a black dog, a gentle fill flash reveals catchlights, brings out the eyes, and adds definition to the fur without flattening the mood. Position yourself with the on-camera flash at 45 degrees to one side of the dog, or use an off-camera flash with a softbox for softer, more directional light.
If the flash looks too harsh, dial in -1 to -2 stops of flash exposure compensation. The goal is for the flash to whisper, not shout.
Silhouette Photography
Sometimes the right answer is to lean into the darkness. A silhouette turns the “problem” of black fur into a deliberate creative choice. Shoot with the light source directly behind the dog (sunset works beautifully), expose for the bright background, and let the dog render as a pure black shape against a colorful sky. Silhouettes work best when the dog’s pose is recognizable – ears up, tail visible, head turned in profile.
Editing Workflow for Black Dog Photos
Editing is where you rescue the shots that almost worked. The Lightroom workflow below takes about three minutes per image, and free phone apps like Snapseed do the same thing with different labels.
Step 1: Raise the Shadows
Open the shadow slider and lift it by 30 to 60 points. This brightens the darkest parts of the image, which is exactly where the black dog’s detail lives. Watch for noise in the shadows; if it gets ugly, back the slider off slightly.
Step 2: Mask the Adjustment to the Dog Only
Lightroom’s masking tools let you brush the adjustment onto the dog, leaving the background untouched. Snapseed’s “Selective” tool does the same thing on a phone. This is the difference between a properly edited photo and the washed-out gray dog look that beginners often produce.
Step 3: Adjust White Balance
Black fur picks up color cast very easily. Blue shade gives a cool cast; tungsten lights give an orange cast. Use the white balance eyedropper to click on a neutral part of the scene (the background, a wall, a piece of clothing) and let the software neutralize the cast. For black dogs specifically, you usually want a slightly warm white balance – it makes the fur look rich rather than bluish.
Step 4: Pull Highlights Down, Add a Touch of Clarity
If you lifted shadows too aggressively, the contrast can flatten. Pull the highlights slider down by 20 to 40 points to restore depth, then add 10 to 20 points of clarity or texture to bring back the fur definition.
Free Phone Editing Apps
You do not need Lightroom or Photoshop. Snapseed (free, iOS and Android) and Lightroom Mobile (free tier) both do selective shadow lifting, white balance correction, and masking. For a quick fix, even the built-in Photos app on iPhone and Google Photos on Android has a “shadows” slider in its edit panel.
Common Mistakes to Avoid
After photographing hundreds of black dogs, we have seen the same handful of mistakes ruin otherwise great setups. Avoid these and you are already ahead of most people photographing dark-coated pets:
- Shooting in direct midday sun. Hard overhead light creates raccoon eyes and turns fur into a flat dark mass. Move to shade or wait for golden hour.
- Trusting the camera’s auto exposure. Auto mode will try to brighten the dog and turn the fur gray. Use exposure compensation or switch to manual mode.
- Choosing a black or white background. Both swallow the dog. Use mid-tones like green grass, a wood fence, or a cream blanket.
- Pointing the flash straight at the dog. Direct flash flattens the fur and creates a harsh catchlight. Bounce the flash off a wall or ceiling, or angle it 45 degrees.
- Focusing on the body instead of the eye. The eyes are the soul of the photo. Always focus on the nearest eye.
- Lifting the entire image in editing. Raising the global brightness turns a black dog into a gray dog. Mask the adjustment to the dog only.
- Skipping RAW. JPEG compresses the shadow data you need to recover detail. Shoot RAW whenever possible.
- Shooting from eye level standing up. Get low – on your knees if needed – so the camera is at the dog’s eye level. This is the single biggest composition upgrade you can make.
Puppies, Adults, and Energetic Dogs
Coat and behavior change with age, and so does your approach. Black puppies often have a soft, downy undercoat that catches light beautifully. Shoot them with slightly softer light than you would an adult, and shoot from their level even more aggressively – puppies are tiny, and an adult’s-eye-level shot makes them look small and lost.
Adult black dogs have fully developed coats that may be coarser or wavier depending on the breed. For a Labrador or a Poodle, use the standard lighting and exposure settings above. For a Schnauzer or a terrier mix with a wiry coat, slightly stronger side light brings out the texture of the fur.
Energetic dogs are a different challenge. If the dog will not sit still, raise the shutter speed to at least 1/500 and open the aperture wide to let in more light. Use burst mode to capture a sequence, then pick the sharpest frame in editing. The lighting and exposure principles stay the same; only the timing changes.
Frequently Asked Questions
What is the best way to photograph a black dog?
The best way is to shoot in soft, directional light, place the dog on a mid-tone background, and underexpose by one to two stops to keep the fur rich. Then lift the shadows selectively in editing to reveal texture and detail without washing out the rest of the image.
What are some tips for photographing a black dog?
Use soft light, aim light at a 45-degree angle to the face, choose a green or warm-brown background, focus on the nearest eye, underexpose by one to two stops, and lift shadows in editing on the dog only.
What colors look good on a black dog in photos?
Soft greens, warm browns, cream, beige, and muted blues all separate black fur from the background without competing for attention. Avoid pure black, pure white, and very bright neon colors.
What are common dog photography mistakes?
Shooting in harsh midday sun, trusting auto exposure, using a black or white background, pointing flash straight at the dog, focusing on the body instead of the eye, and lifting the entire image in editing instead of masking the adjustment to the dog.
How do you focus a camera on a black dog?
Turn on eye detection if your camera or phone has it, position the nearest eye in the center of the frame, and half-press the shutter to lock focus before recomposing. If autofocus hunts, tap a brighter part of the face such as the brow ridge to give the system more contrast to lock onto.
Why do black dogs look like a black blob in photos?
Cameras meter for average brightness, so when a large dark subject fills the frame, the camera over-brightens the image and turns the fur into a flat gray mass with no visible features. Underexposing by one to two stops fixes this.
Final Thoughts: Photographing Black Dogs With Confidence
Learning how to photograph a black dog without losing detail comes down to three habits: control the light, control the exposure, and control the edit. Pick soft, directional light, underexpose by one to two stops, choose a mid-tone background, and lift the shadows selectively in post. Do those four things on your next session and the black blob problem disappears. For more on pet and family photography, browse our other guides and reach out if you want to book a session with our studio.